From out of no where, staked furniture caught my eye. I believe it was a simple stool posted on Instagram that the poster said they had built in about a day. A tapered, rounded mortise and tenon joint that is done with two simple tools seemed like hand tool woodworking on cheat mode. I put it aside at the time as I was busy with other endeavors. It came up again weeks later when another Instagrammer I follow posted a picture of the two tools he had just recently purchased and received. Well, if he was doing it I wanted to do it too.
I jumped over to LeeValley.com and ordered both items I would need to make staked furniture joinery: a tapered reamer and a tapered tenon cutter. While I waited I thought about what I wanted to build and it came to me one night as I was putting my two littlest to bed.
I was in the middle of doing partial remote work due to COVID-19 lockdowns at my place of employment. The area that used to be my office space has slowly been converted into a woodshop over the past two years. I typically sit at my dining table when I type up things or have to use my laptop. If the kids are home and I am doing remote work, this is less than ideal.
In the corner of my bedroom, there is an open spot beside one of the windows that was just long enough to perhaps fit a small table – something like a desk. It’s right across from the crib so while putting my kids to bed, I could sit there and study or use my laptop. Using some materials I already had along with my budding interest into staked furniture, maybe a staked desk was in order. Thus it was decided.
Design
Materials
The Legs
Prepping the square pieces was easy on the table saw – set the fence and cut. Planning for the hexagons was a little bit different. I decided to take all the components home from the wood shop I patronize some time so I could finish the project at home. I don’t have a table saw at home.
To layout where to plane for the hexagons, I found the center measurement of a leg face and divided that measurement by half. I then set my marking gauge to that measurement and made a line on each sides of every face and planed down to those lines.
The thickness of the legs, even with the hexagons, was still too large for the tenon cutter. I had to spend a few hours with a drawknife, a spokeshave, and a chisel slowly working down the diameter of the legs to fit into the tenon cutter’s opening.Once it fit though, cutting the tenons was a breeze.
The Battens
The battens, also made of cherry, were cut to length followed by the edges being cut to 8 degrees on the table saw. Made to sit inside of a large sliding dovetail, these components add more “umph” to the leg to stabilize any potential racking. The interface between the desk and the legs involves boring and reaming a tapered mortise.
Splay and rake are term used for determining the angle at which the leg will sit inside the batten. For all staked furniture pieces, these angles are important but apparently we shouldn’t obsess over them. The combined angle of both of these numbers is the angle at which you bore and ream your mortise. To learn more about these two angles and how they become the all encompassing “resultant angle”, read this article by Christopher Schwarz.
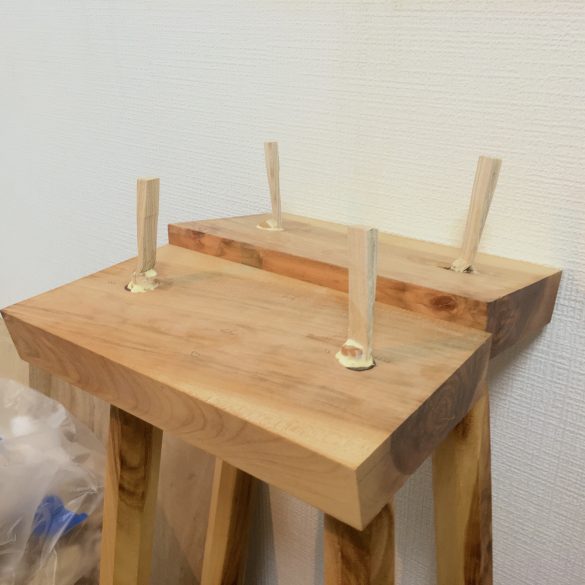
I made a gross miscalculation of required splay angle when initially boring. I set the angle at 4 degrees. That was entirely too little of an angle for such a skinny desk. Unfortunately, I made the bores directly into my cherry battens. To fix the problem, I made some quick tenons out of scrap wood that I had and filled the existing bores with those pieces using epoxy.
With the battens filled, I set out to recalculate the correct angle and this time I did it in scrap pine. 11 degrees turned out to be perfect for splay. I went for about 30 degrees of rake also. I mustered up some courage after a few more test bores and then bored directly into the cherry again. Important note: use your brace for both boring and reaming. Perhaps some are comfortable with using a cordless drill for reaming, but it felt completely uncontrolled to me.
This time, with the 30 degrees of rake and 11 degrees of splay, the legs looked perfect to support the desk. It was time to move on to top prep.
Take Me To The Top
And what a beautiful top it is. I purchased this piece of birch a few months before I started this project and for the first few month, I had no clue what to do with it. Luckily it was the perfect size for this project. Both edges were live, so the first step was to get rid of one of them.
I drew a rough line on the face of the top edge to follow and pulled out my 26″ panel rip saw to take care of the job. Once ripped, I corrected a slight inward bevel by cleaning up with the jointer plane.
The other edge had some bark and other crud on the front of it. For this project specifically, I picked up a drawknife. I had never used one and I wanted to see just how efficient it was at taking care of tasks like this. It worked very well. I do need to get better at sharpening it, but for the most part, no issues.
There is a spot on the front edge that juts out a little bit. Post-bark removal, It was necessary to soften this portion as there were quite a few jagged pieces. A spokeshave, rasp, and various grits of sandpaper were able to knock this down so it would stop cutting me every time I bumped it.
With the bulk of the material removal complete, it was time to move on to the next task – defect filling. This particular slab looked to have been left out in the elements for a bit. Between worms and water damage, some cavities had formed in various places. For the rot, I chiseled out those areas as best as I could to clear away the soft areas. I then taped it up and prepared an epoxy mix to fill all the voids.
24 hours later, I came back, removed all the tape and began the surfacing of both sides. Between my smoothing and scraper plane, I did my best to avoid sanding. In the end, however, I had to borrow a half-sheet sander from a friend to get my desired level of a finish ready surface.
Organizing the Top
With the top surfaces, it was time to set it aside to work on the smaller component of the desk. As I wrote above, I wanted the desk to have some sort of shelving on the top for papers, books, office supplies, etc. The milled cherry gave me two boards that would suffice for the requirement.
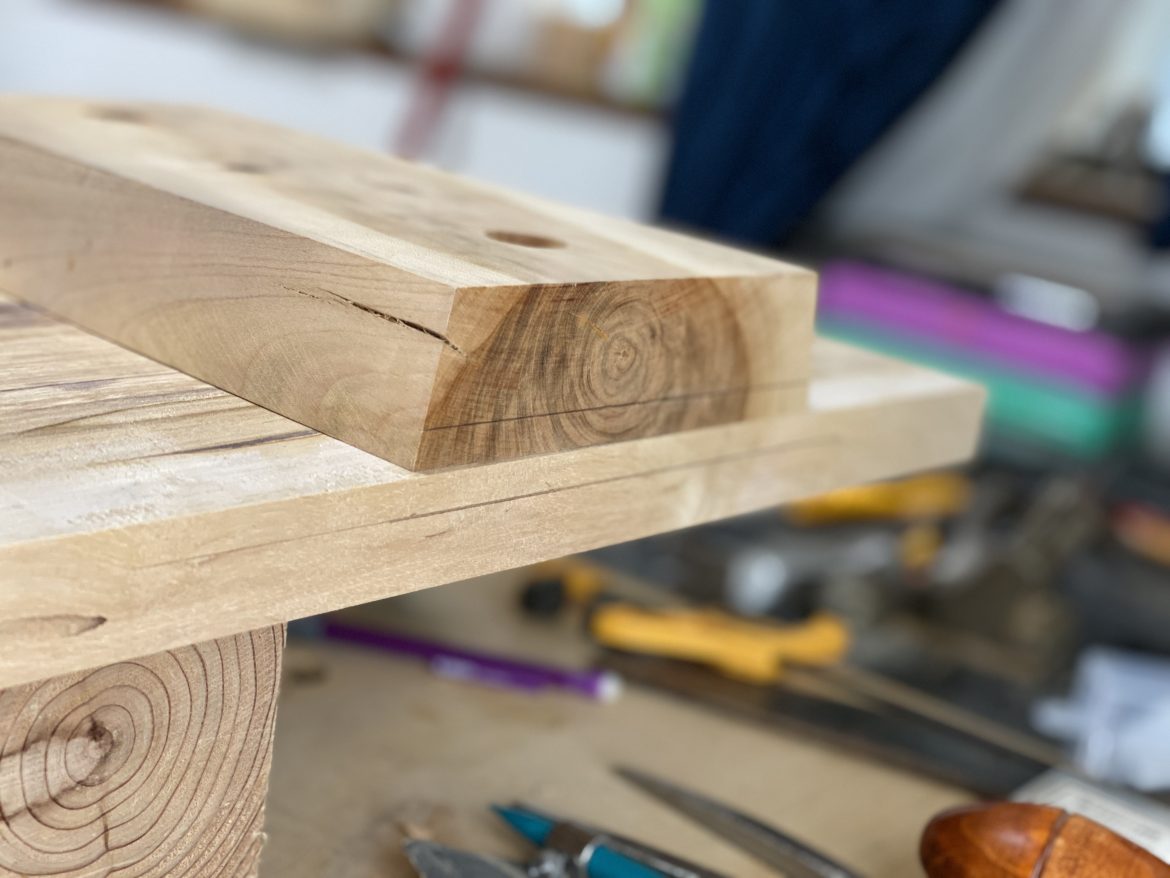
The first step was taking them from rough stock to S4S. At the community workshop, with the aid of a bandsaw, I resawed a larger dried piece we cut that came out beautifully with very little twist into the two boards. I took them home and began the final processes for making them usable. I ended up with 4 boards from the two; two sides, a top, and a middle shelf.
Dovetails: The Organizer
For the past several projects, I have forced myself to include handcut dovetails in some way. The only way to get better at them is to do them thus forcing myself allows for more practice. This would be two sets of dovetails and a housed double wedged through mortise and tenon joint for the shelf – that’s a mouthful to say.
For one particular side, I had enough stock to do a continuous grain. Unfortunately the board wasn’t long enough to do it all the way from side to top to side. It still looks good in my opinion.
The dovetail layout was a simple three tail through dovetail at my favorite ratio of 1:8. Blue tape is a friend for these situations. Since the boards had already been surfaced, I did not want to mar them up with pencil marks. A few strips of blue painters tape allowed me to label all the edges in their appropriate orientation. I use an alphabet labeling scheme when I do dovetail joinery.
Once layout was done, it was time to cut. With all the tools laid out on the bench, I got to work. There isn’t much to say of the methodology of dovetail cutting. It’s been covered so many times on the internet and in writing already. I took my time and was careful to not force the saw or the chisels. In the end, there were some gaps but as far as previous dovetails go, these weren’t my worst.
Any time I lay out a housed mortise and tenon joint, it is a complete lesson in patience and attention to detail. There is a careful order of operations for layout that must not deviate otherwise inconsistencies build up. Before I explain my process, I’ll clarify what this joint is. A housing joint is a groove or a dado. A mortise is a cavity in a board that accepts a mating piece called the tenon. A double mortise and tenon is two tenons of the same piece going into a piece with a double cavity. A through mortise and tenon means the tenon is exposed on the opposite side of the mortise entry (it goes all the way through the mating cavity). A wedged tenon means a kerf is made into the tenon to accept a wooden wedge to add extra strength. Now that you can picture what a housed double wedged through mortise and tenon is, here is how I laid mine out on the sides of this organizer.
Layout in Technicolor
For laying this joinery out, I only use the bottom and front edge when using my squares or gauges. This is more consistent than trying to come at the lines from every way with different measurements. I like to start with the outside face. Using a pencil and a combination square, I do rough pencil lines where the tenons will come through the face.
- Set the combination square to the distance the first tenon’s outside will be from the front edge and mark the outside of both boards by placing the anvil against the front edge of the board and marking at the end of a blade with a pencil. Make the pencil mark in the general area of where you believe your shelf will sit in the dado.
- Repeat this step on both boards for the inside of the first tenon, the inside of the second tenon, and the outside of the second tenon based on how you want your spacing to go and the size of the tenon you chose. Continue referencing the front edge.
- Get out your marking gauge and set it referencing from the bottom edge of the board to where you want the bottom of the shelf to sit. Mark a line on the inside face of the board.
- On the outside face of the board, mark a line only between your two tenon pencil lines for each tenon. Striking a line across the full length will cause you to need to plane down a lot of material to remove the line during clean up.
- Reset the marking gauge by adding the thickness of your shelf board to the existing distance from the bottom shelf and repeat steps 3 and 4.
- Now repeat steps 1 and 2 but do it with your marking gauge and only knife in a line between the top and bottom edges of the tenon. in the previous steps. At the same time you are doing this step with the mortise, you can use the same settings on your wheel to mark the tenons on the shelf board.
- Use a marking knife to dig the lines in a little deeper using only the front and bottom edge.
In total, I reset the combination square four times and my marking wheel six times. The double tenons don’t need to be the same exact width as each other – just close enough to where the naked eye can’t tell. I like to use a pencil first because they establish rough references lines without digging into the work. Digging into the work requires clean up later.
If you’ve made it this far, you should know to also set a depth of your dado and set a length of your tenon based on your boards. Once the mortise board is laid out, it’s not too hard to layout the negative in the shelf piece.
Tenon Layout

Outside face of side A. Unfortunately, I didn't follow my own advice here and dug in a little longer than I needed to. Oops. I was still working on the process.
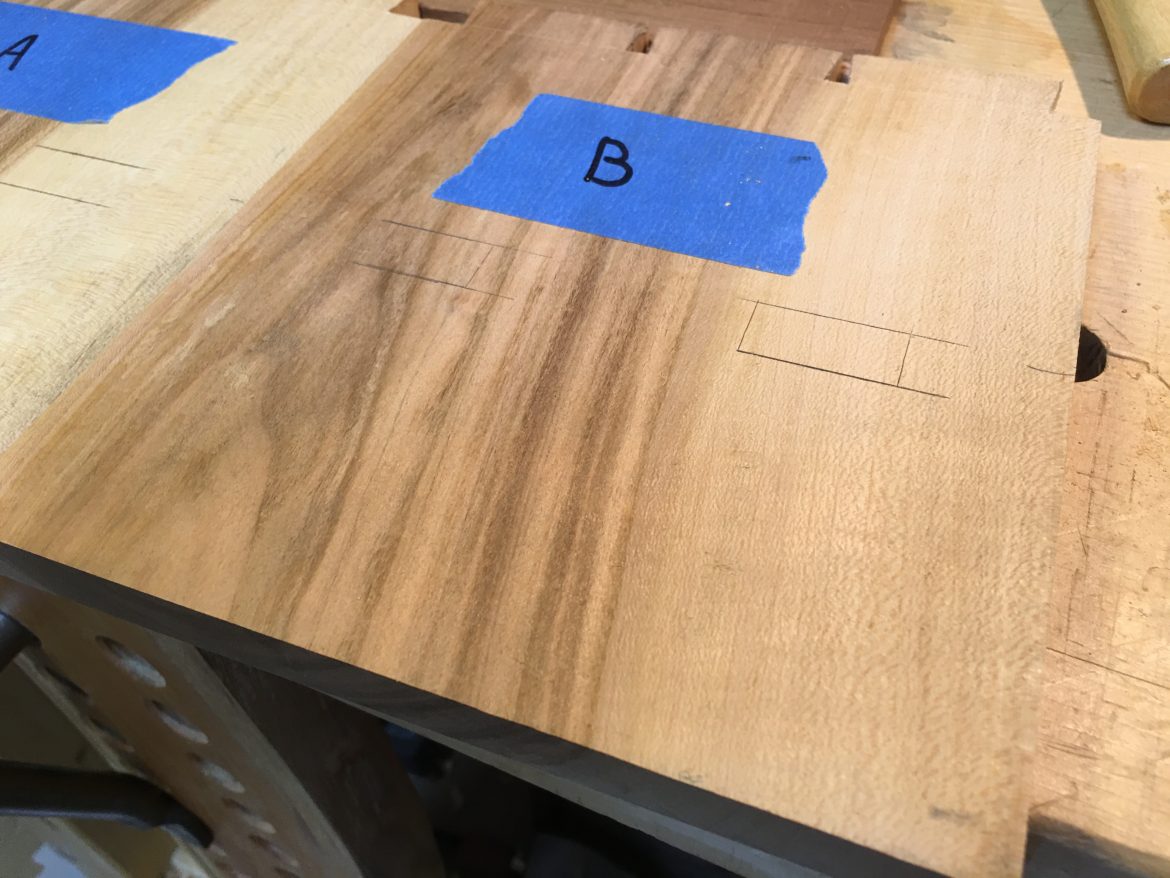
Outside face of side B. Unfortunately, I didn't follow my own advice here and dug in a little longer than I needed to. Oops. I was still working on the process.
After completing layout, to begin actually removing material, I start with the mortises first and come back to the dado. From the face side, I used my drill press and a Forstner bit to clear out the majority of the waste. Then just chisel continuously to the marking line. I knew I was going to need to do horizontal wedges during this step because I tried to take too big of a chunk at one time on the A side and ended up moving my knife line back significantly. Mistakes happen.
With the mortise cut out, I used a router plane to remove the dado material to depth. You have a few options to avoid wall grain tear out. The first being you can use a carcass saw to dig out the wall to depth, being careful not to go over any of the lines. What I like to do though is to continually go back after taking material away and re-knife my wall with my marking lines. I feel this leaves a cleaner cut. Granted, this method takes longer but I think the end result is worth it.
As you proceed in depth with the router plane, you should be cognizant of potential spelching on the mortise walls the this isn’t a problem with the first few passes because those errors will be removed with successive passes. However, as you approach final depth, you should pare in from the wall each mortise like you would a longer dado. Take it slow and be aware of what the wood is doing.
With your tenons half way marked out, finish those up and then remove the material to create the negative of the housed mortise piece. Do test fits periodically and everything should come together fine. To finish everything, I used my tenon saw to create a horizontal kerf in the tenons to accept a wedge during glue-up.
Organizing the Organizer Glue-Up
Everything was test fit several times during material removal. I did a few more dry fits to ensure I had the order in place. Once I was confident in the order to glue everything, I pulled out my GluBot full of TiteBond II and got to work.
The top and bottom shelf got attached to side A first. I checked that everything was snug and then fit in side B, using a conservative amount of glue. I used clamps to bring it all together and then inserted the wedges. For this particular glue-up, I went with Team Wet Cloth Wipe-Down rather than Team Scrape It Off Later to get rid of the squeeze out. After checking for relative square, I adjusted clamps as needed and left it overnight. I took everything off, cleaned up all the lines, and put finish on it. It was ready to be part of the larger staked desk.
An Organizer Glued-Up
Dovetails 2: Sliding In
As explained in “The Battens”, both the batten’s sides were cut to 8 degrees to later act as a sliding dovetail into the bottom of the desktop. Laying out this sliding dovetail was a little complicated – as was cutting it out. I spent several days trying to determine the best way to go about it. I finally reached several steps in my mind and put them to action.
First I chose a depth at which they would recess into the top. Setting a marking gauge to the desired depth, I marked a line, in the end grain of the batten, using the wide face of the batten as the reference.
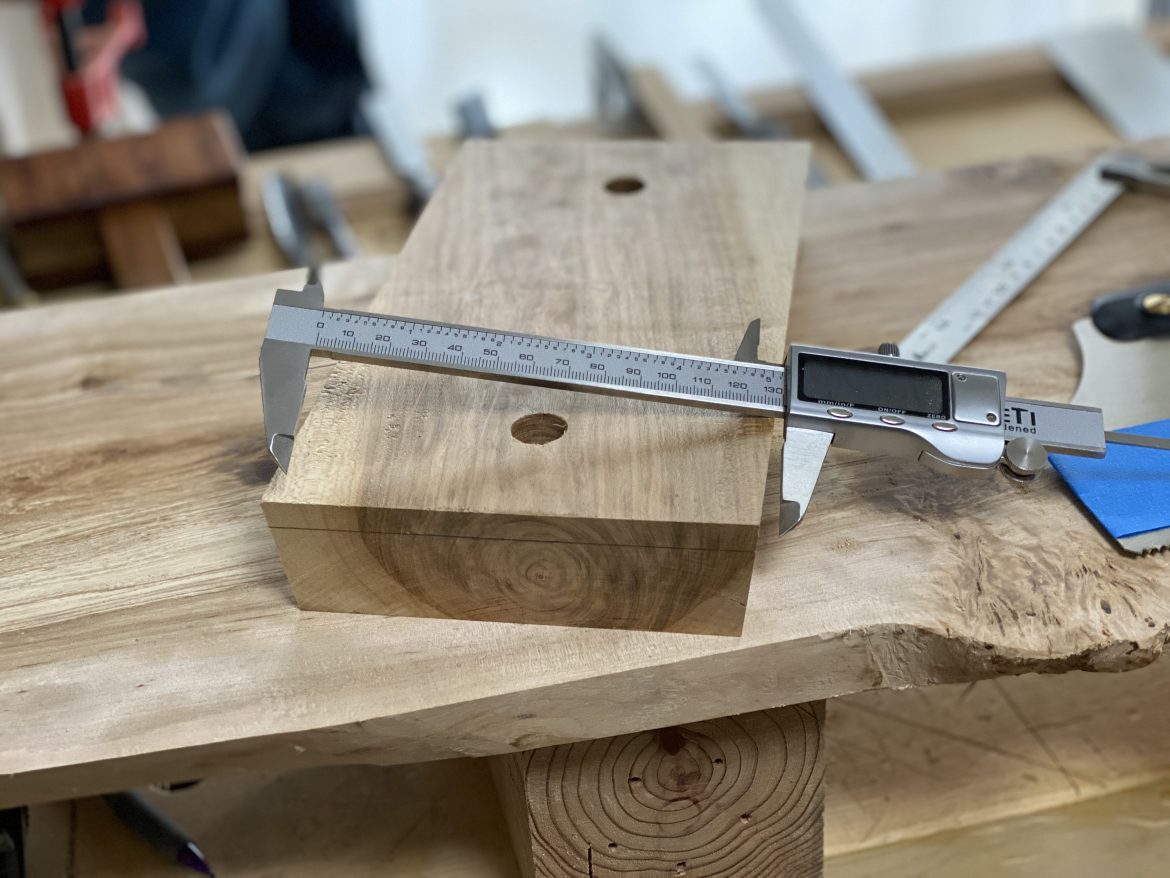
I then used digital calipers to get the distance between the two end points of the marked line. I chose a point on the top to be the outer edge of the batten. Using the digital calipers, I nicked the inside edge of the batten with the blades with the caliper’s blade, using the other blade referenced against my chosen starting point. Then, using the squared edge (not the live edge – obviously) of the top, I marked a line at both points on the edge and transferred that line the depth of the slab. With the marking gauge still set to depth, I made a line between those two points to layout the depth the batten was to sit.
I’ll try to be brief on how I cut the sliding dovetails. It’s a daunting task the first time you undertake it but once you understand it, it’s actually quite simple.
With my tenon saw, I used blue tape down the blade as a sort of depth reminder on where to stop cutting. With that in place, I clamped the batten down parallel to the marking line I made previously, making sure the outside of the tenon saw tooth set didn’t overhang the line.
I used the angle of the batten as a saw guide and cut to depth. Rinse and repeat for the other three lines. Once they were all cut, I began to cut out the middle cavity so the batten could fit. One side was done by hand which was pretty exhausting – so the other side I whipped out my router. Both sides were cleaned up with my router plane since it was already set to depth.
Cutting Out the Cavity (Non-Dentistry)
Insetting the Organizer
To make the desktop organizer a permanent part of the desk, I needed to cut two dados into the top. Blue tape came to the rescue once again.
I wasn’t completely confident the organizer came out completely square, so I laid strips of blue tape over the general area I wanted to inset the organizer. Setting the organizer over the blue tape, flush with the back edge, I used a block plane iron to score light and then heavy marks around the organizer into the tape.
The marking knife in the picture is a lie. It kept cutting into the side of the organizer or veering off course, thus I switched to the iron. I managed to keep firm pressure on the organizer while doing this so it wouldn’t budge. Then, much like other housing joints, I cut away with my router plane, slowly but surely.
Finish and Glue
Everything at this point was cut, routed, and finish ready. I did a once over on the desktop with a half-sheet sander starting at 100 grit to 220 grit. A half-sheet sander finished the task in no time at all.
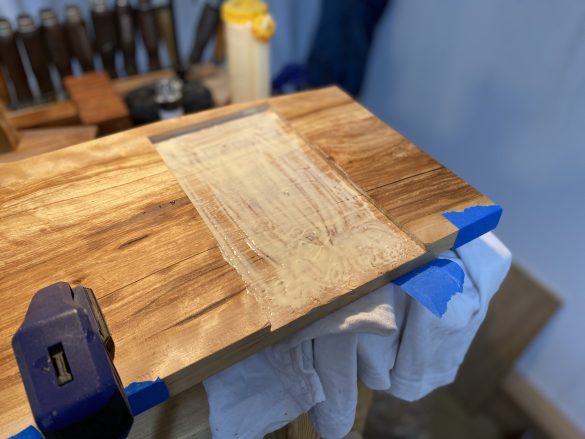
Before gluing the organizer, I finished the top with homemade danish oil. The first coat goes on fairly heavy with the excess being wiped off after about 10 minutes. After that I did 3 more thin coats with one coat every 10-12 hours.
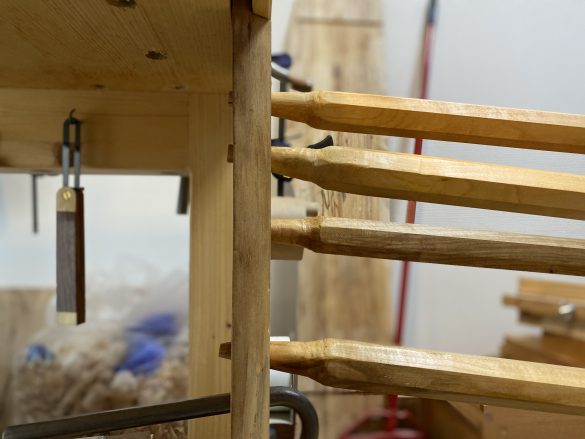
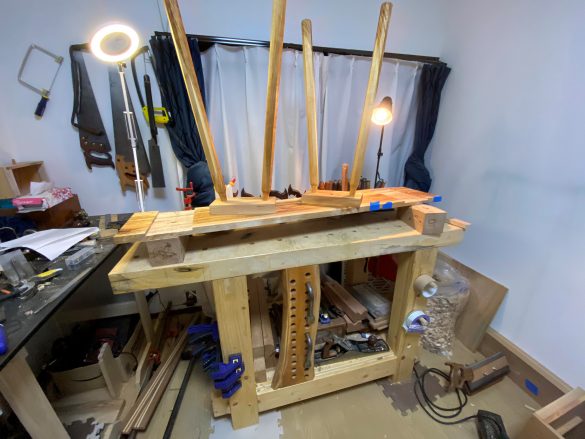
With the finish set on the battens and legs, I glued those up first. I made wedges and cut a kerf in the tapered leg tenon to accept the wedge. I then pounded the legs into the battens, ensuring they were tight. I flipped the battens with the legs of and used a dull chisel to pry the wedge kerf open just enough to accept the wedge. The wedge was then hammered in just enough to expand into the mortise. Once the glue dried, I flush cut the remaining sticking out.
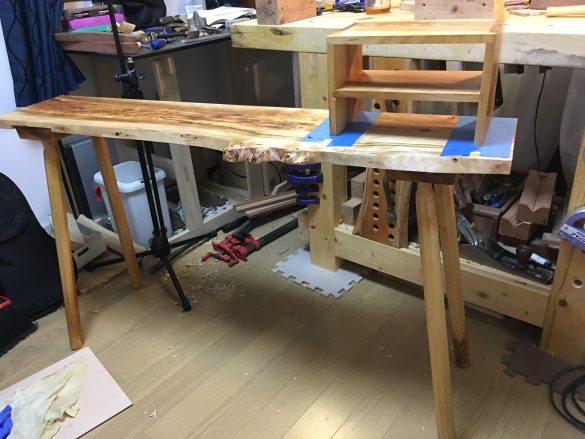
The next glue up stage was the battens into the body. I had tested the fit previously in a dry run and all was good. There was nothing left to do except smear a light layer of glue in the cavity and hammer the battens in. Once hammered in, I flipped it over and glued the organizer into place. Everything was left to sit overnight.
All Coming Together


Final Details
The final step was to even the legs out so the desk would sit flat on the floor. The largest, mostly flat surface I have is my bench top. With the desk on top of the bench, I used a pencil taped to a scrap piece of wood to mark out cut lines. Luckily all of the legs sat on the bench so much wasn’t required to remove.
With the line to cut marked, I propped the desk up on its back with some clamps and used my carcass saw to cut at the line. I then used a chisel to chamfer the edges of the leg. The desk was finished.
Beauty Shots, Takeaways, and Appreciation
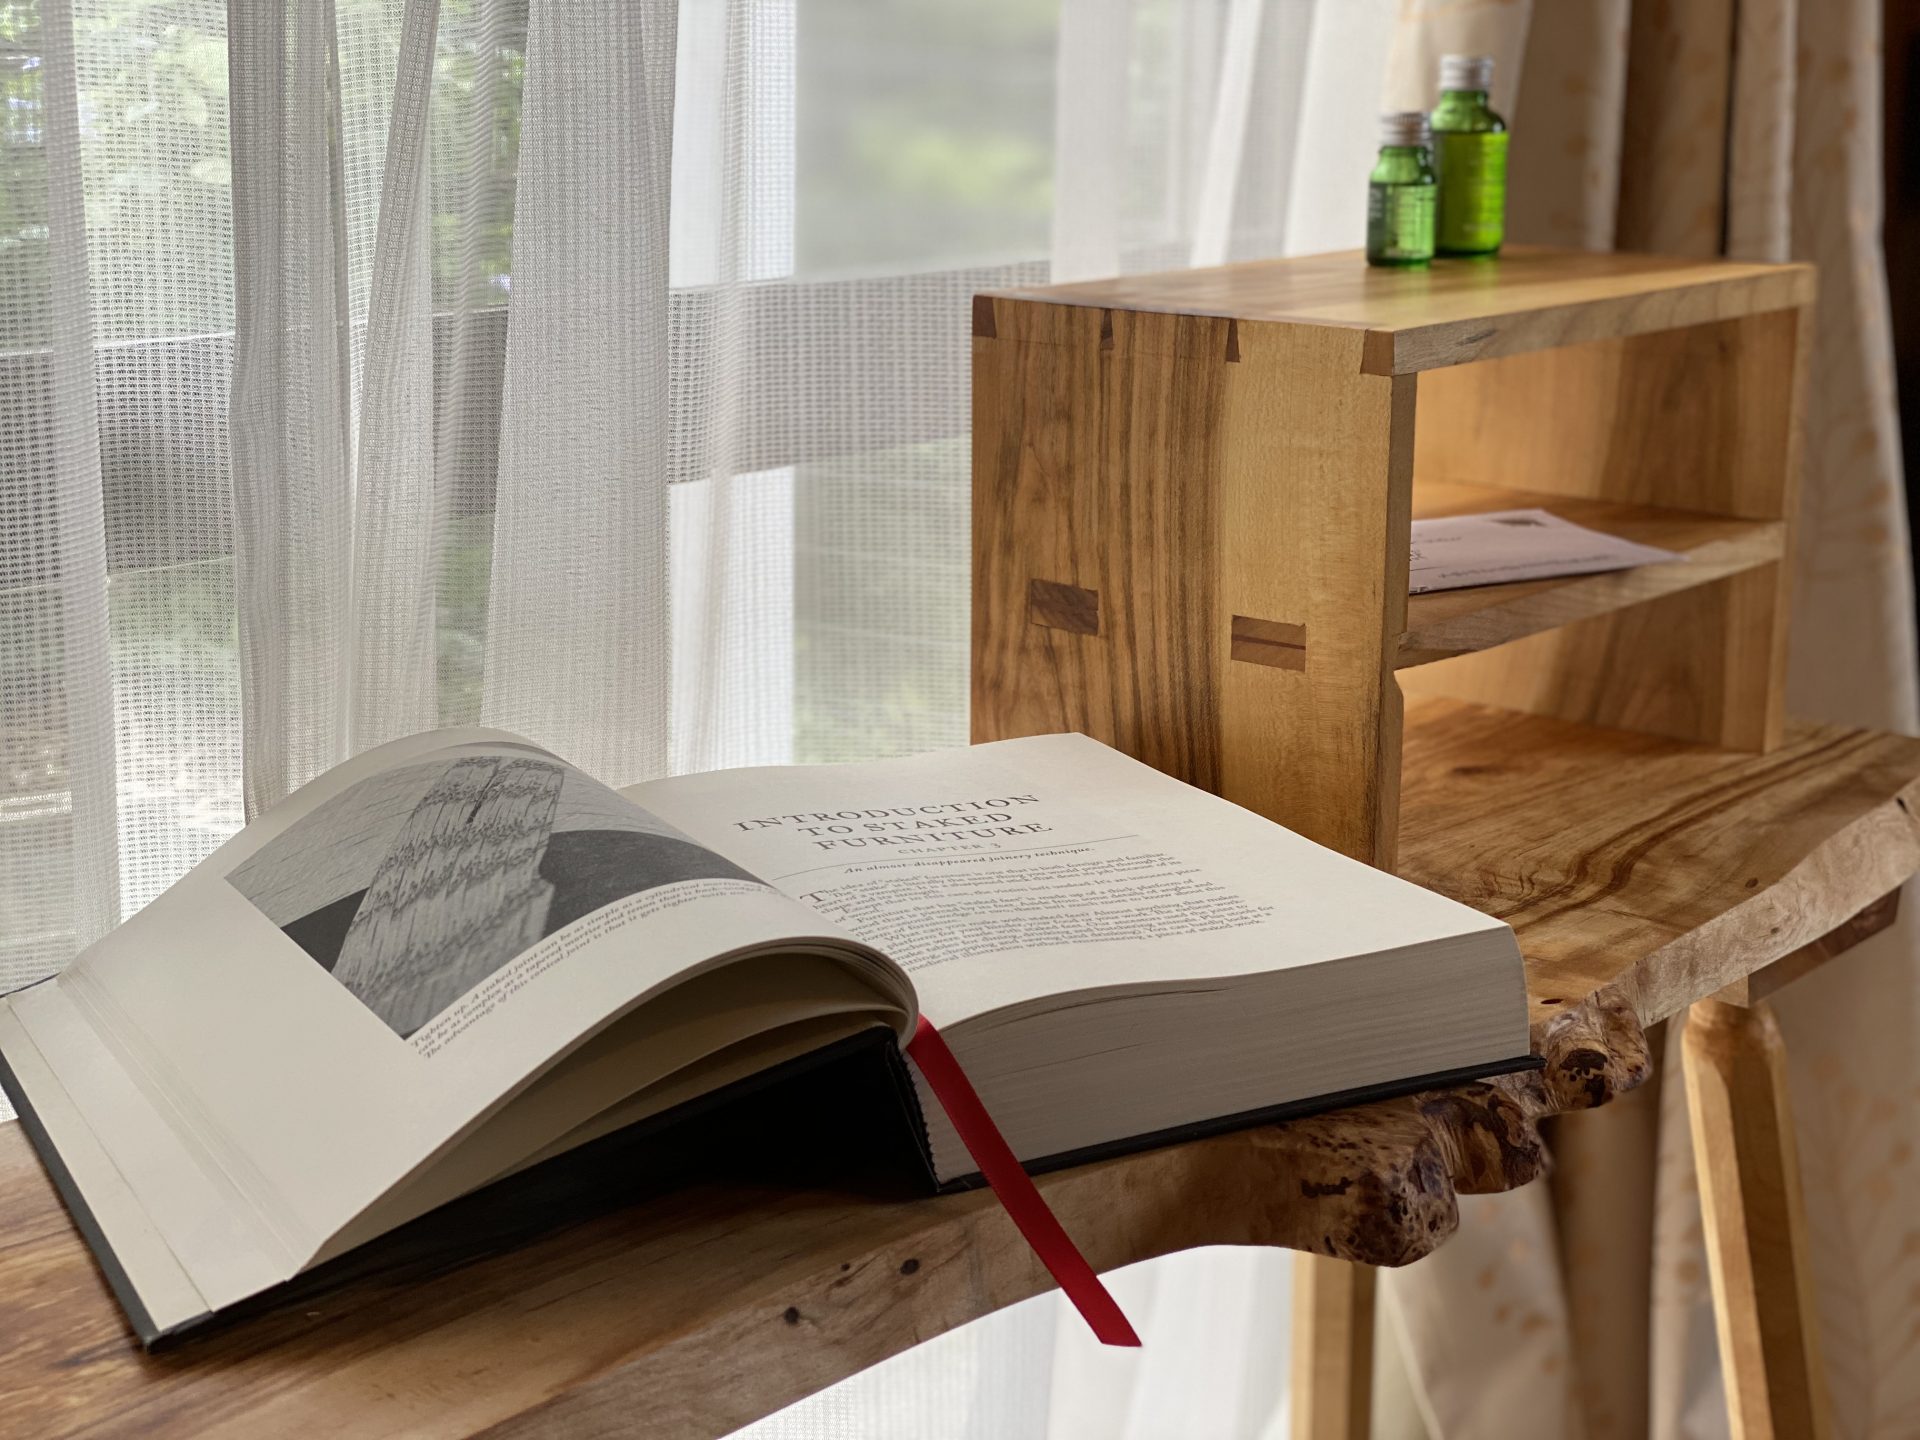
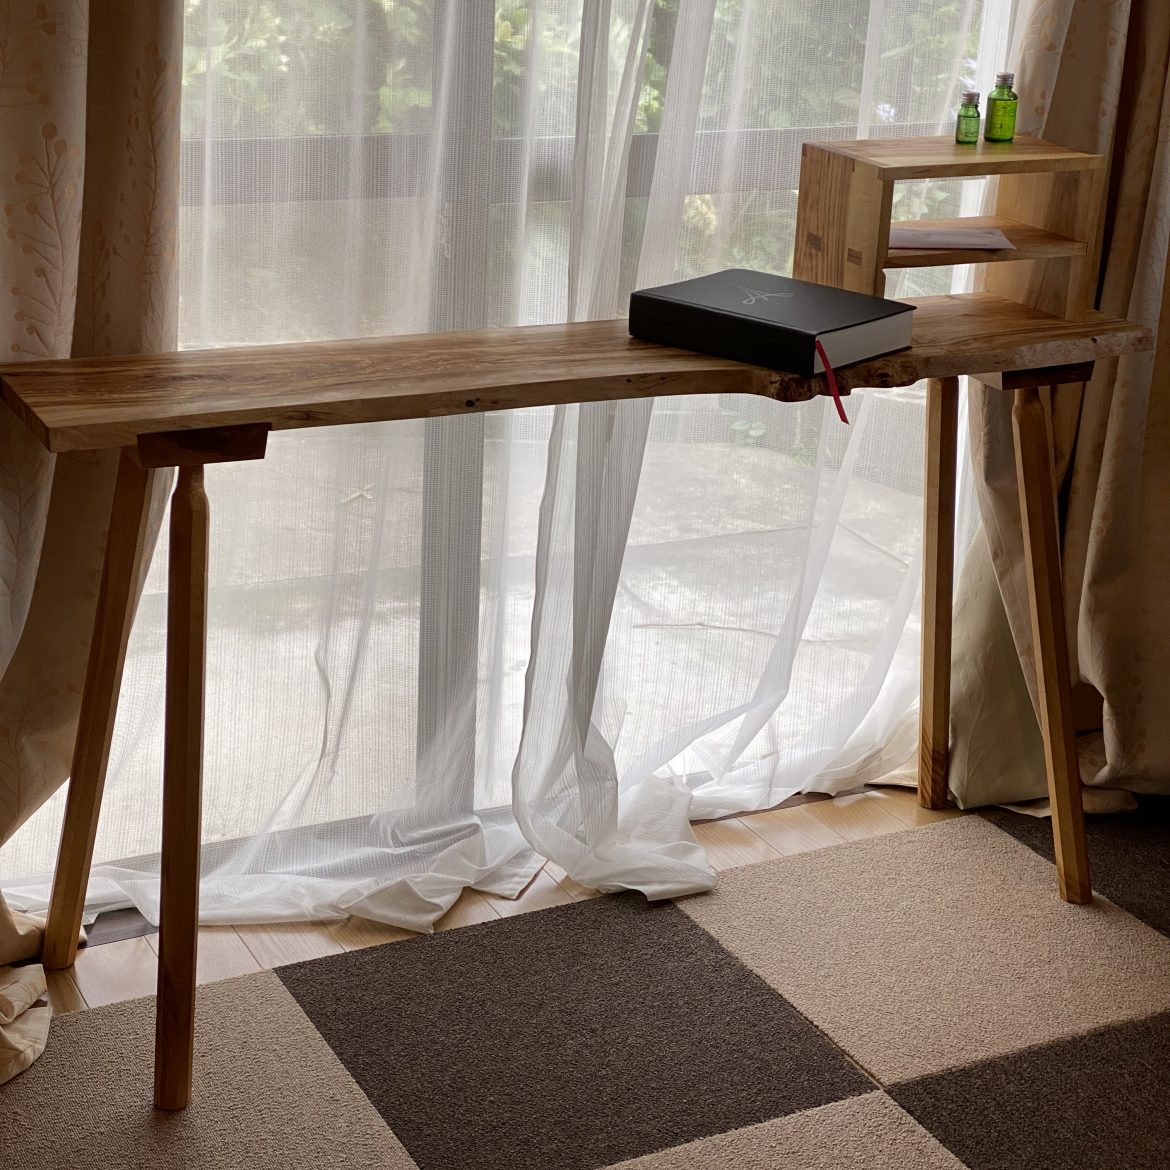
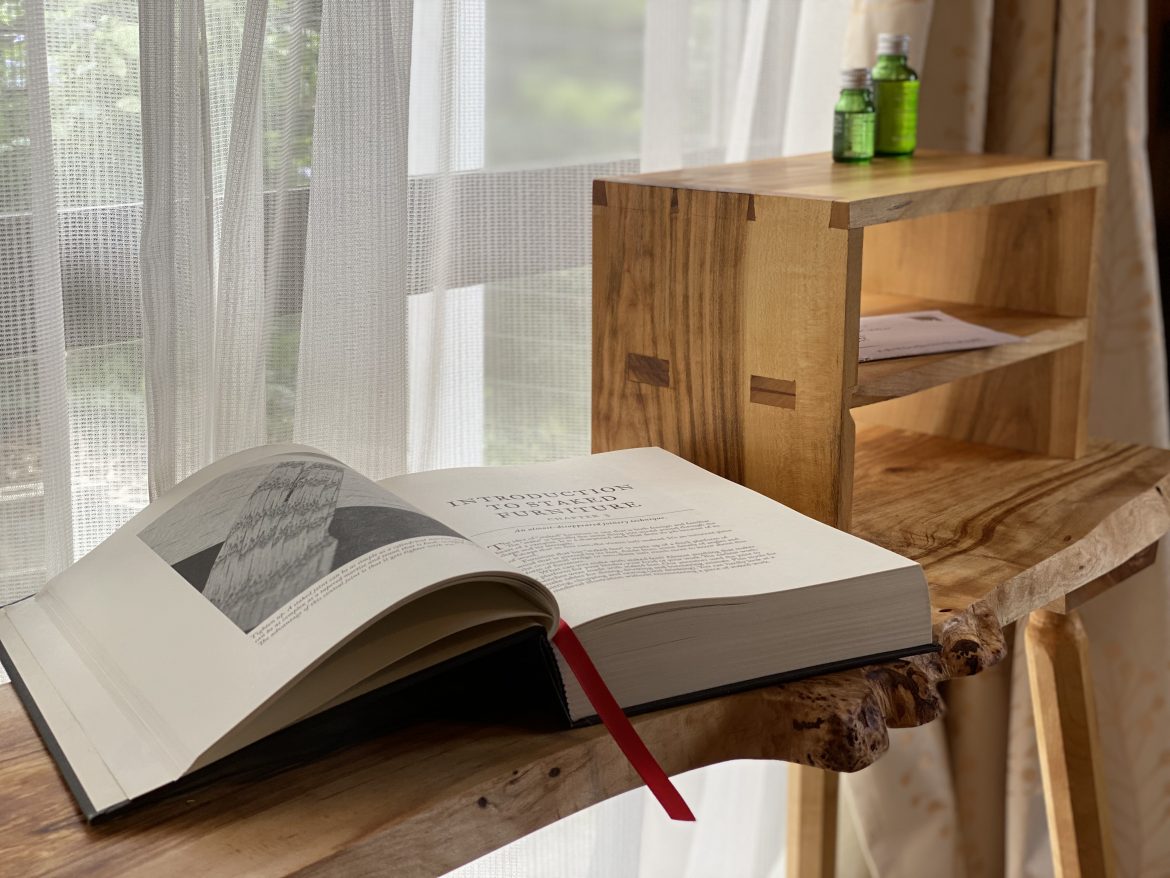
With the desk finished, I took some final beauty shots in my living room. My wife was gracious enough to lend me some time with the kids out of the way so I could get some nice pictures in. I then cleaned out the space where it was to rest permanently (or until we move.) It fits beautifully and it works as intended. I used it while I wrote this article.
Overall, I am pleased. I dislike live edge table tops typically but I had never tried one. It’s important to try even though you might not like it. I definitely don’t think I’ll start producing a plethora of live edge desks and dining tables, but the aesthetic has grown on me.
I must take the time to give a huge shout out to Kieran Binnie over at Over The Wireless and on Instagram @overthewireless. He built a staked desk in the past and was an immense help to me during this project. I am incredibly grateful to him. If you read this Kieran, thank you!
