Living in Japan, working amongst a highly ex-patriate population, moves, departures, and transitions are bound to happen. As people decide that the Japan life is no longer for them or that living so far away from family is taking its toll, coworkers and friends eventually decide to return to the United States to live the next chapter of their life. A good friend and coworker of mine did just that at the end of last year. Yes, it was sad to see him leave, but I wanted to ensure that he would always have something to remember our friendship by. I decided to build him something as a gift.
Several months prior to his departure date, he emailed me a link to an Instructables article. It was for building something I had never heard of – a biltong box. Biltong is a South African meat treat. Seasoned and cured meat is hung inside a box with a heat source and a source of airflow and left to dry. His comment in the email was “if I had had more time here, this would have been a fun project to build.”
I had my gift idea
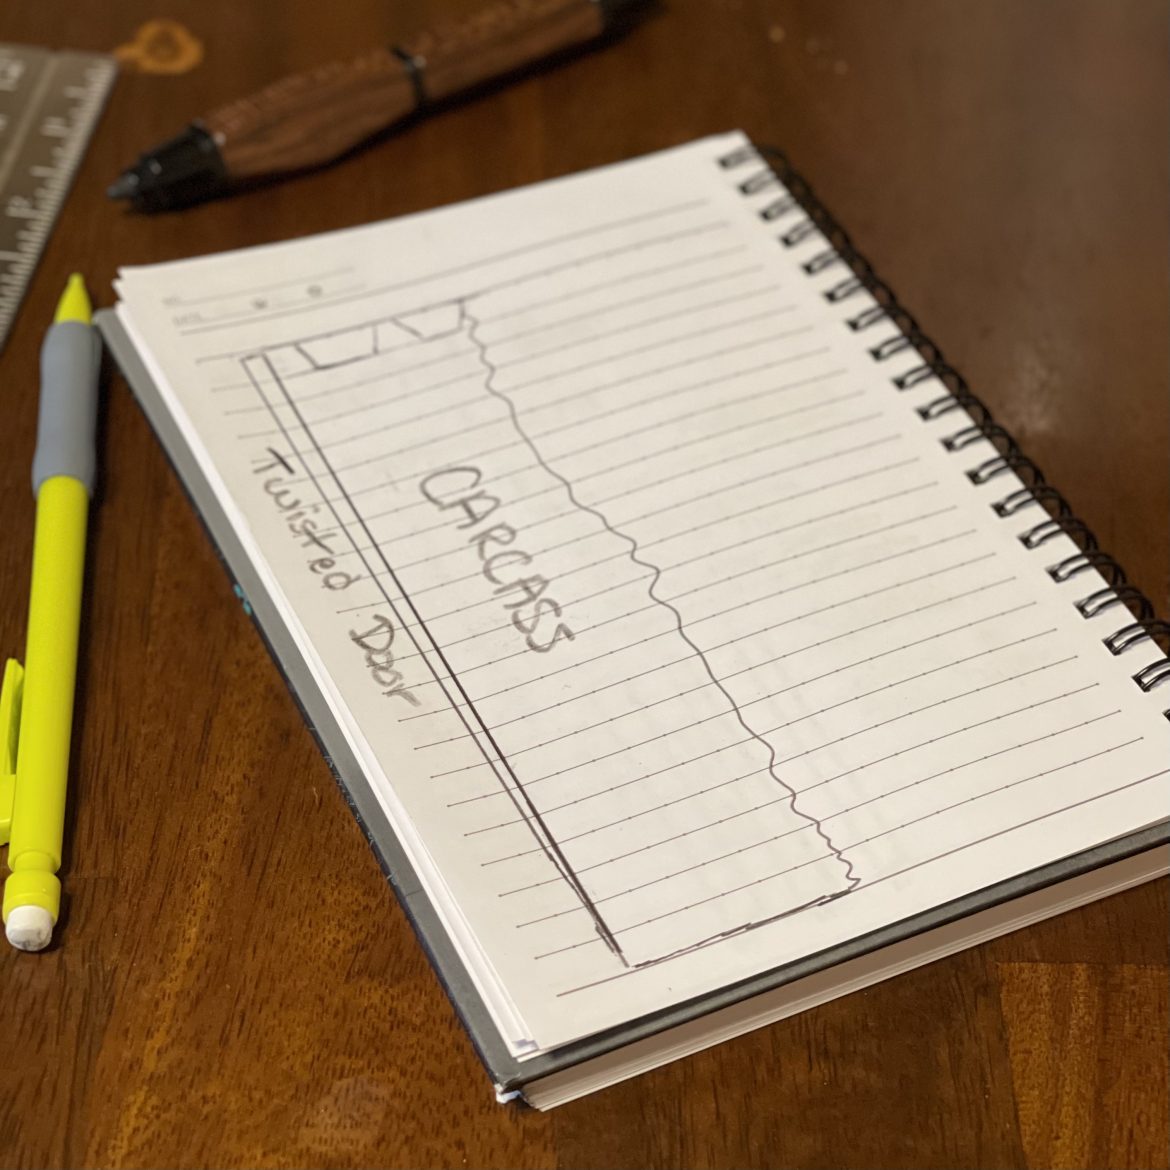
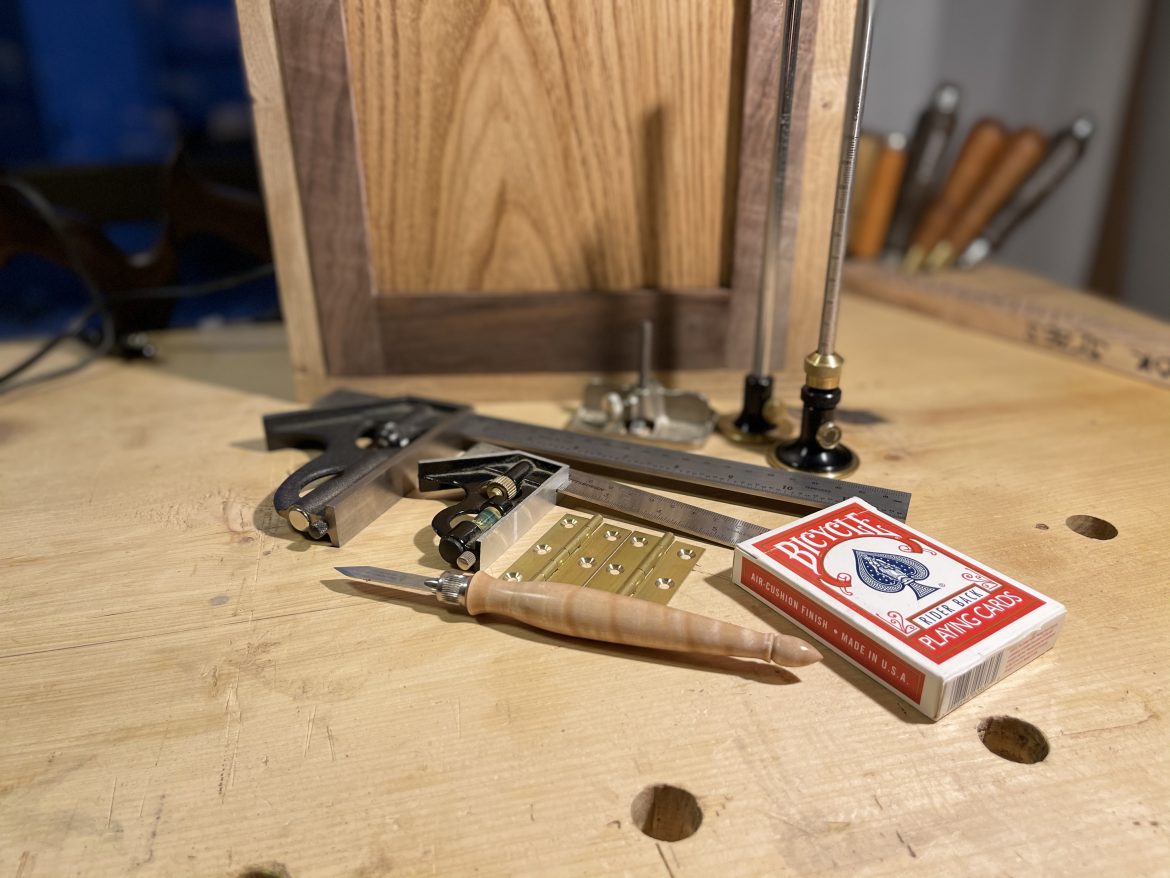
Design
The easy method would have been to follow the Instructable using sheet goods and basic hardware, concluding the project in a day or two. But I am me, and I could not bring myself to do that. I did have spare chestnut and black walnut on hand. The carcass and panels would be chestnut. The simple frame and panel door’s frame would be black walnut and attached with mortised butt hinges.
The dimensions were arbitrarily chosen. Somewhere around a height of 18 inches high and 12 inches wide. The depth was around 9 inches or so. The left side of the box would house an incandescent lightbulb that would act as the heat source. The back panel would hold a fan for airflow. The meat would hang from one of two dowels seated at the top of the box.
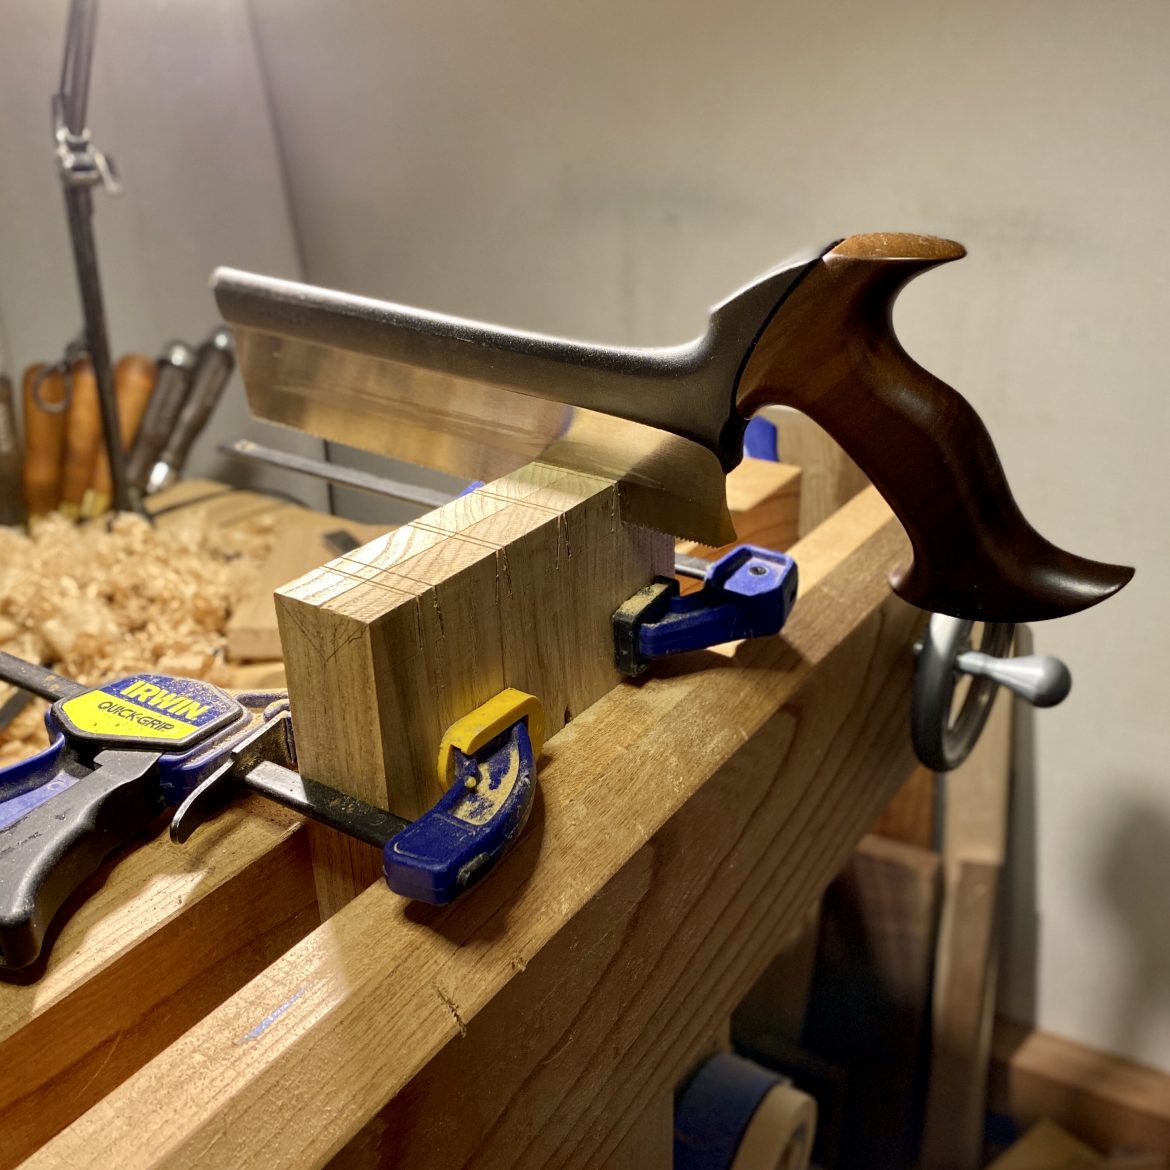
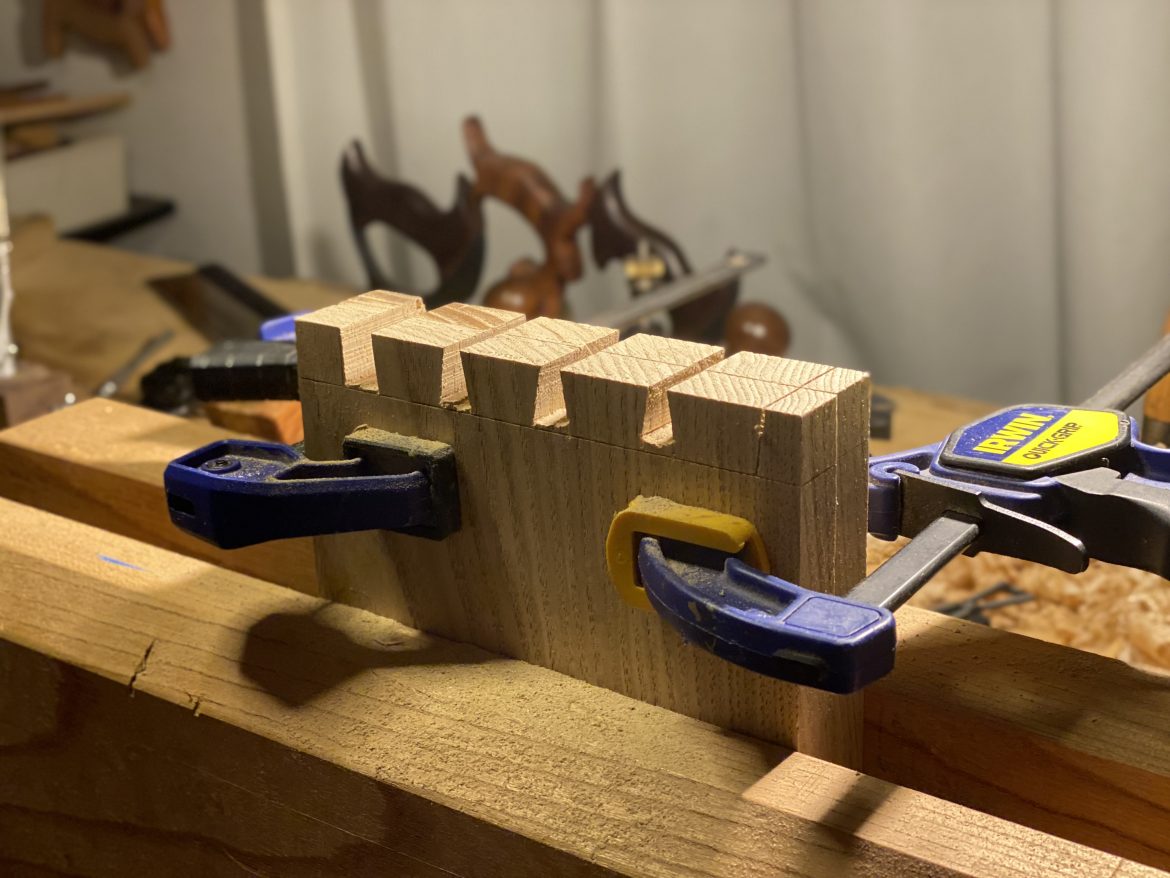
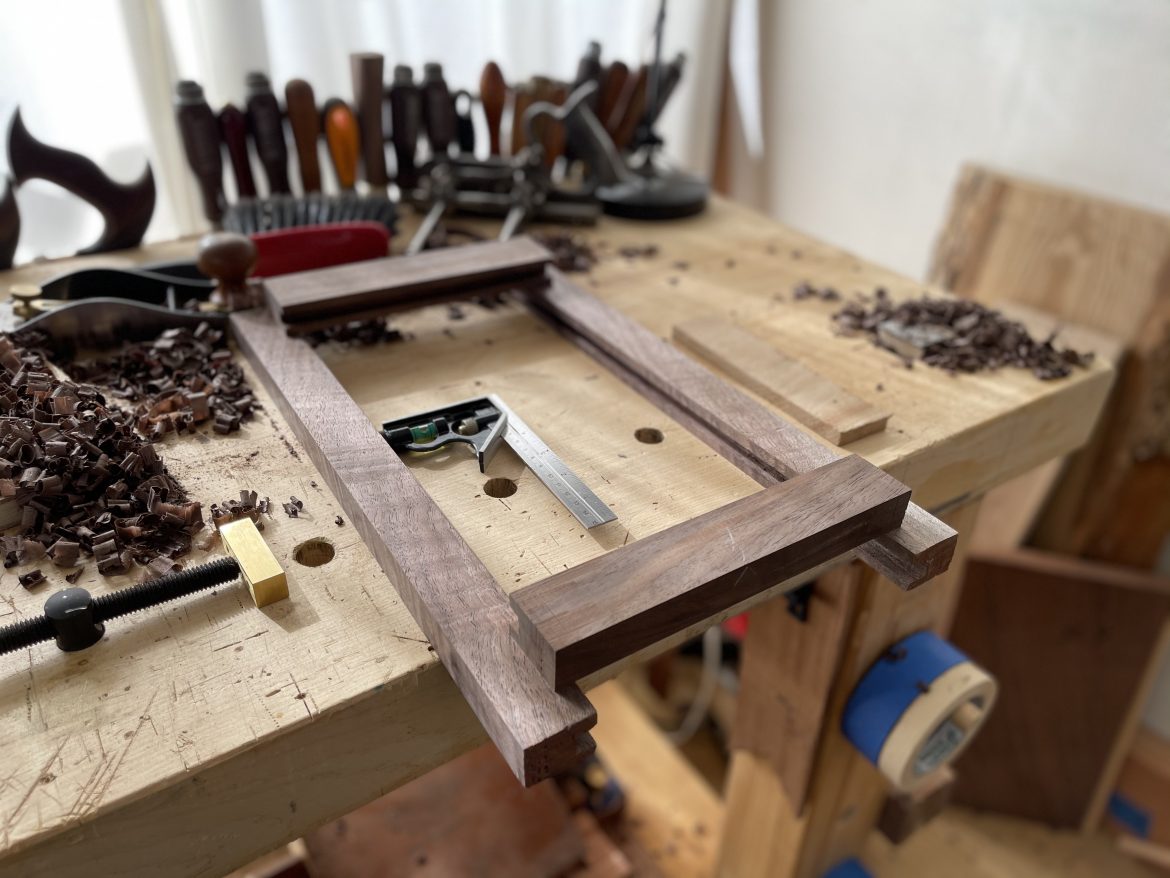
I have made it a point to include dovetails in each of my projects. Increased practice is a Good Thing™ and forcing myself to incorporate them into a project is the only way I will get better. For this project, the carcass joinery would be mitered dovetails. The miter was necessary to accommodate a rebate on the back which would hold the back panel.
Carcass Construction
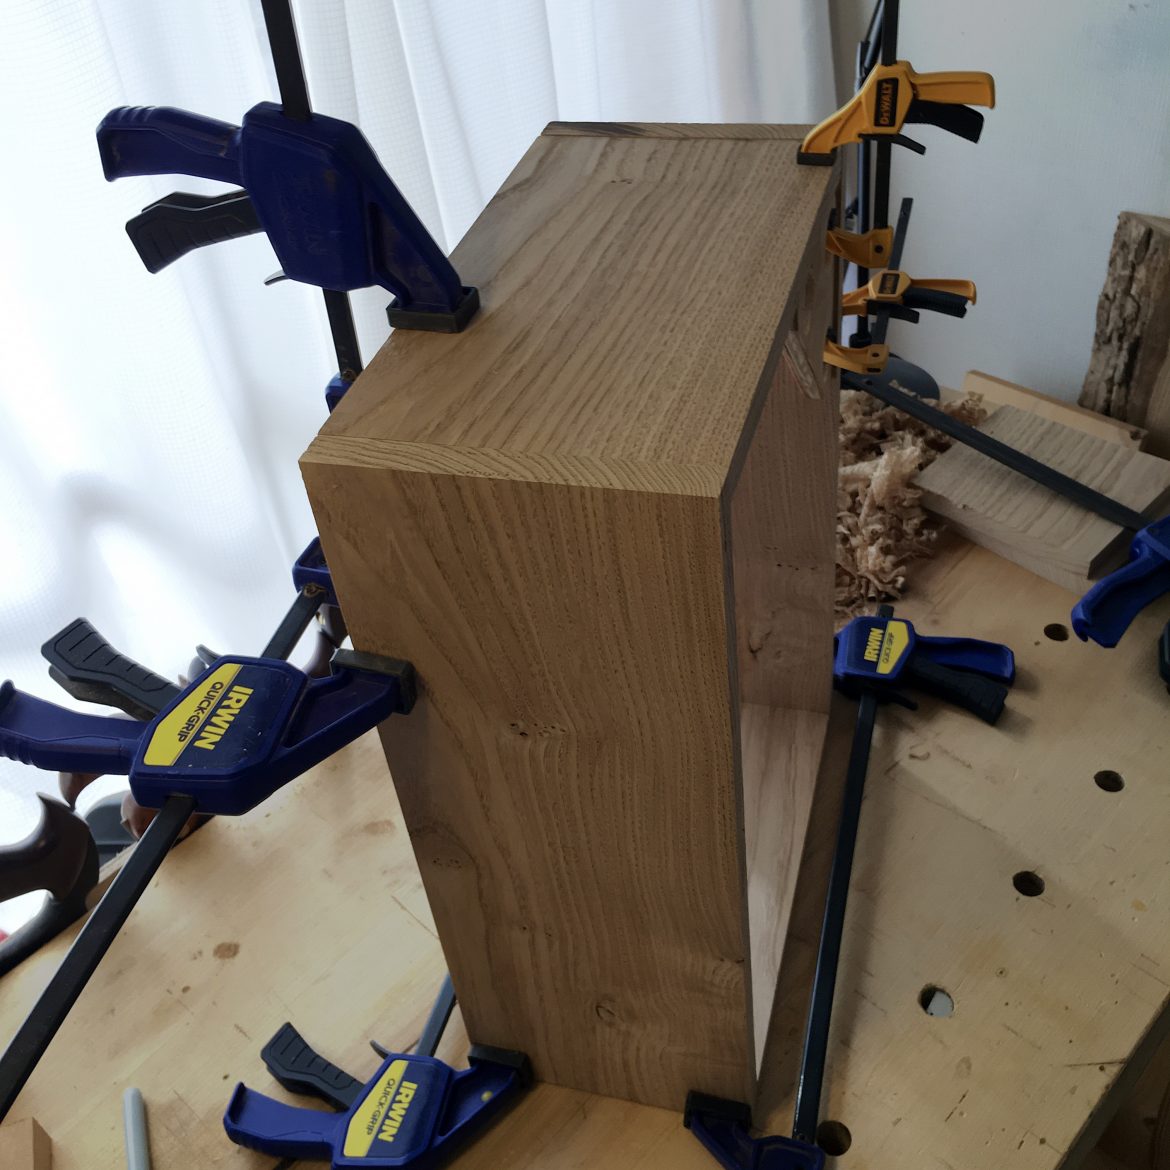
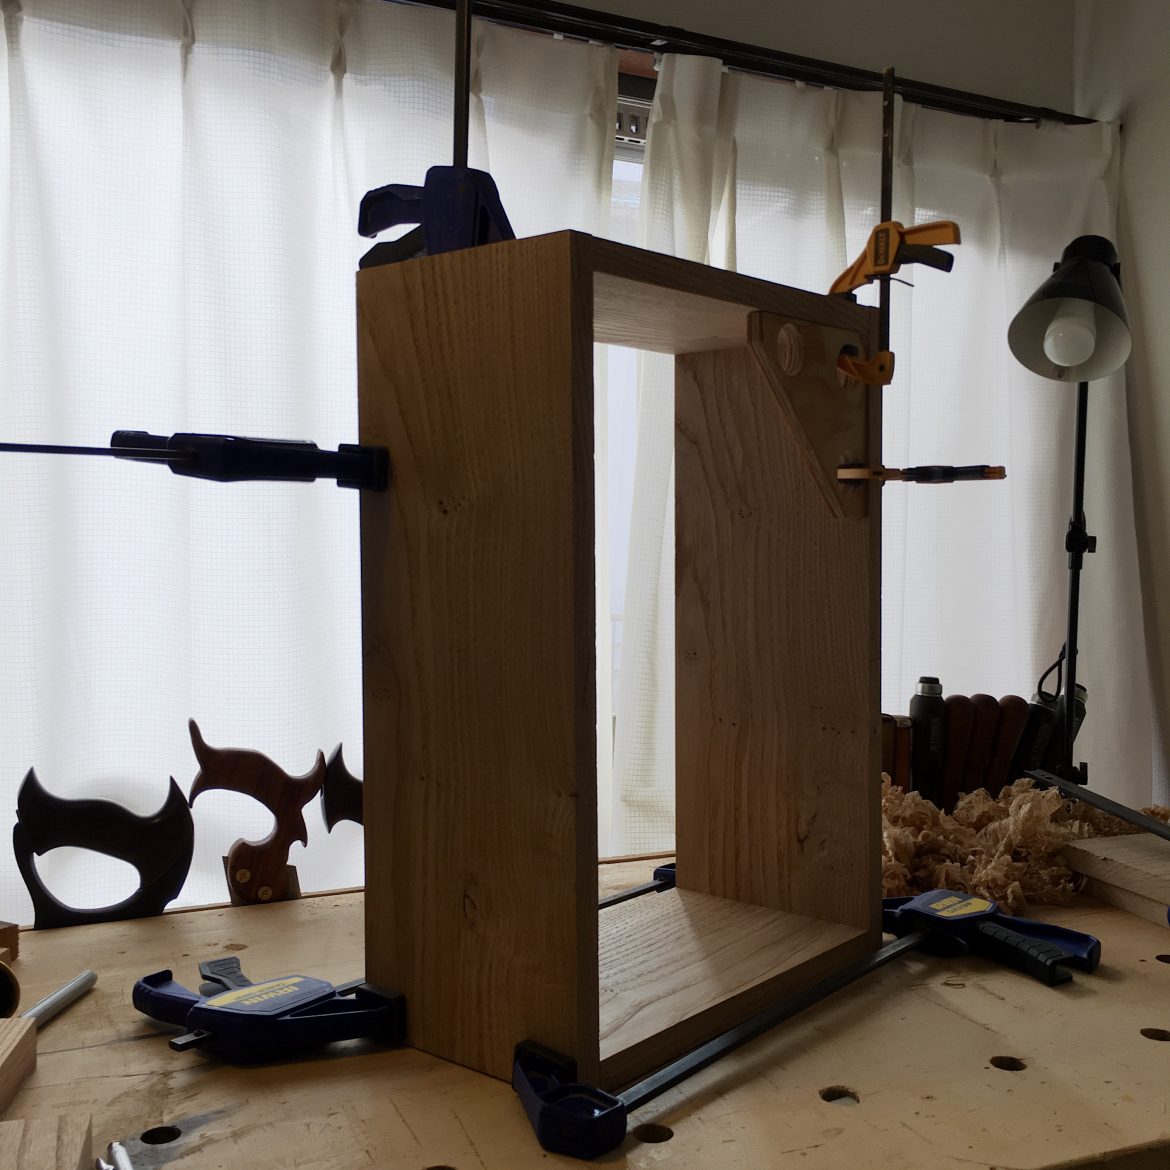
The topic of dovetails has been beaten to death in publication and on the internet. I won’t further drone on in elaborate explanation. I matched the tails to their appropriate pin board, marked them out, cut the pins, and then cleaned them. Just like that, we had carcass joinery completed. The mitered portion adds some complication but incorporating them is just a few extra steps that I hope to write more extensively about in a future post.
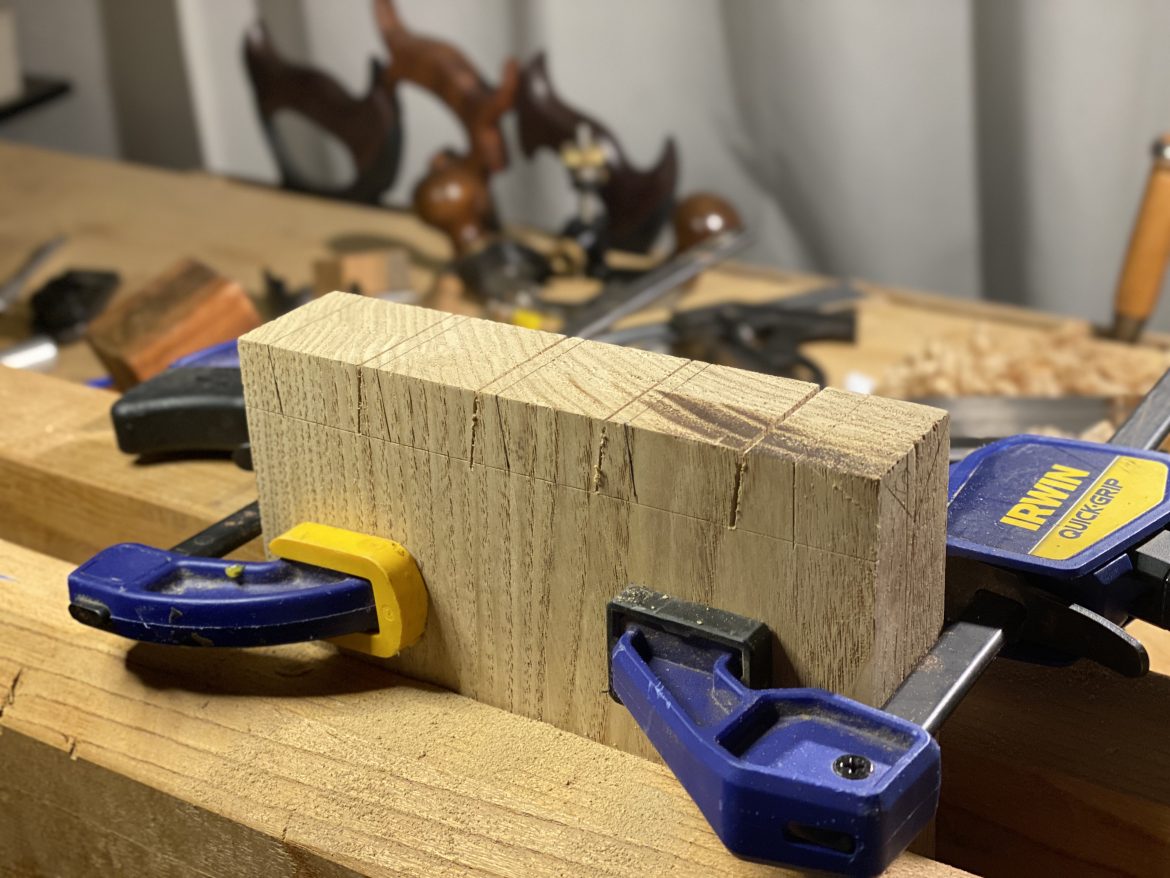
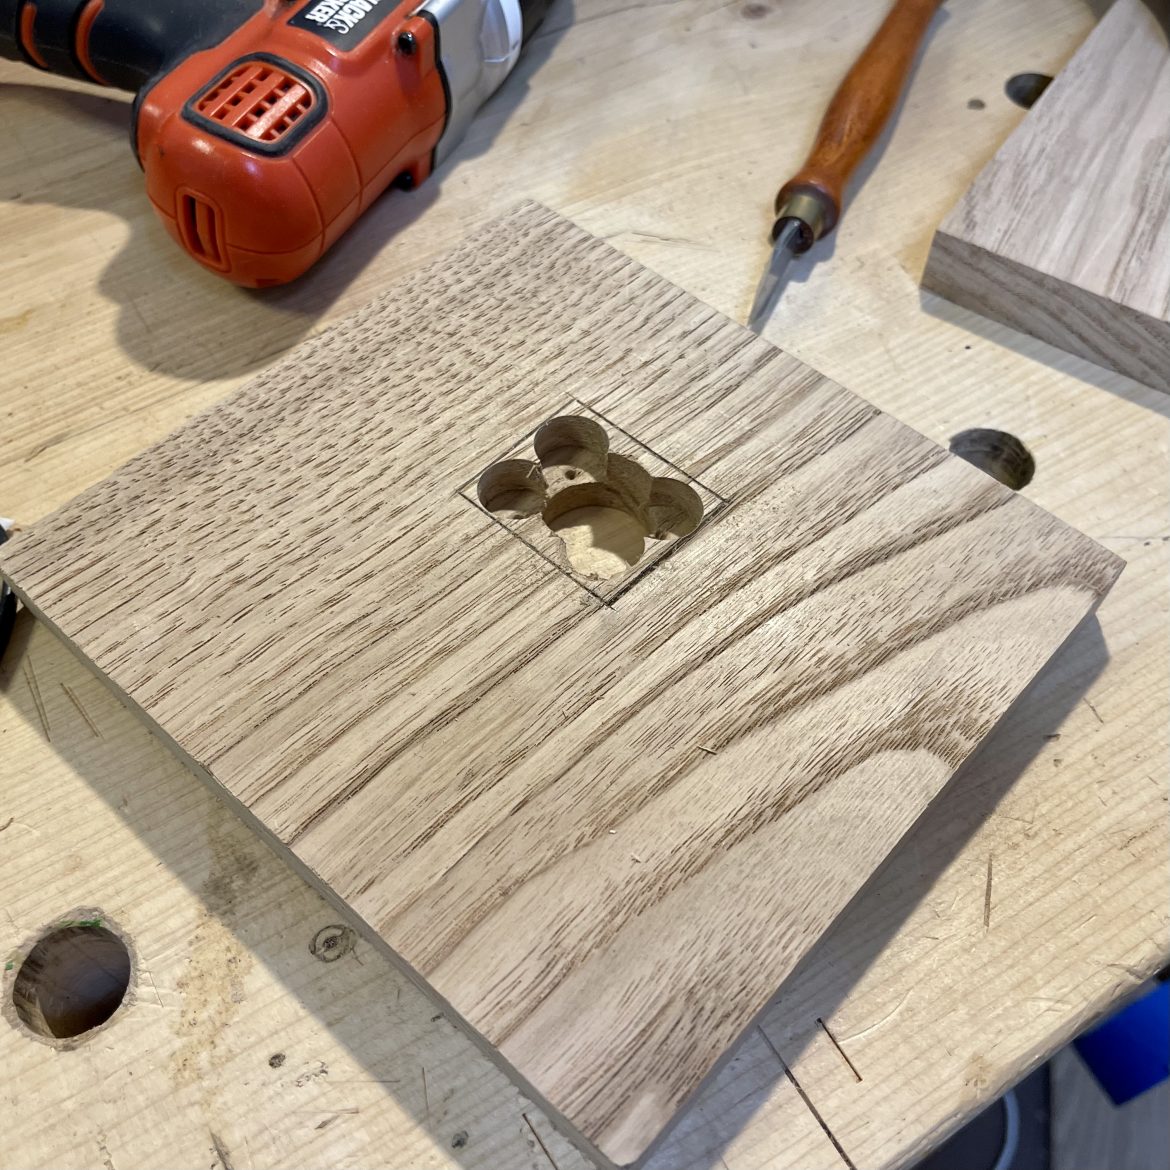
The meat hangs from one of two dowels. The dowels required a rounded mortise to allow them to seat in the carcass and those mortises needed to match up on both sides. To draw matching points for the dowels, I doubled up the tail boards with clamps – inside faces together. On the edge that would be the front of the carcass, I picked a point near the top and squared a line across both edges. I then unclamped the pieces and laid them inside face up and drew that same line across both faces. I set two combination squares for two arbitrary depths to mark the center of the dowel mortise. A drill press made quick work of the rest.
Dowel Mortises


Glue ups can be stressful, and this was no exception. Along with having to seat the dovetails, I had to ensure the dowels went into their appropriate mortise on both sides of the carcass. The best strategy was to do a dry run, see how the components came together, and then take it slow when it was time to use glue. Because I didn’t have the back panel arranged, I had to ensure I was square before the glue set. My longer combination square on the inside of the carcass aided greatly during this tedious process.
When doing large glue-ups like this, I like to lay down a non-stick foam sheet underneath my gluing components, so my bench doesn’t get messy. I also put down a few strips of blue painter’s tape and use it as a surface to hold glue for the pins and tails. A little paint brush dipped in the glue aids in getting into the tight spots.
Carcass Glue-Up


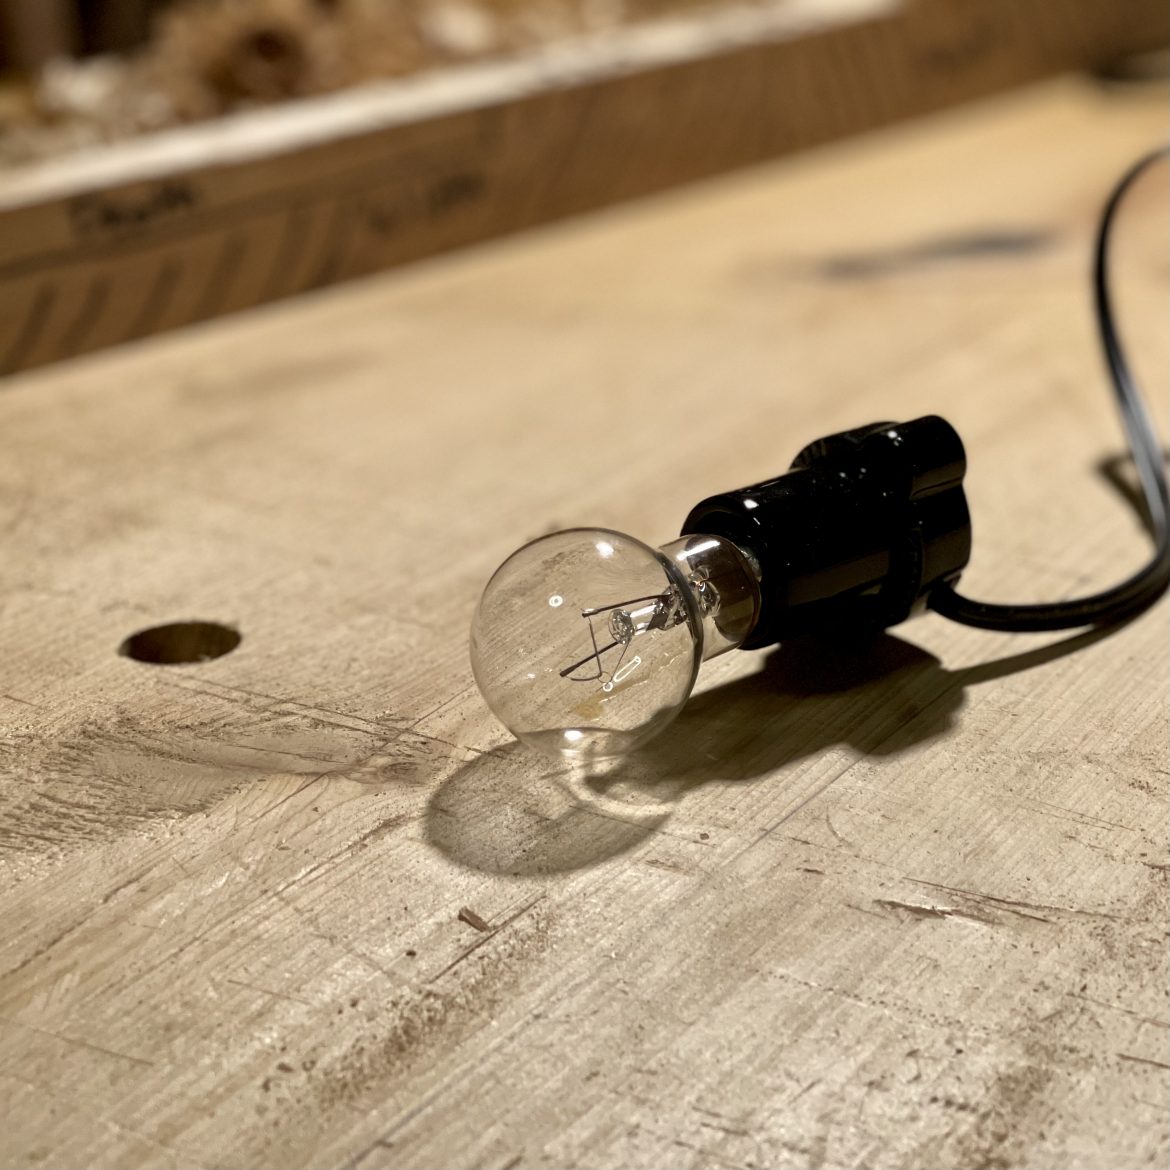
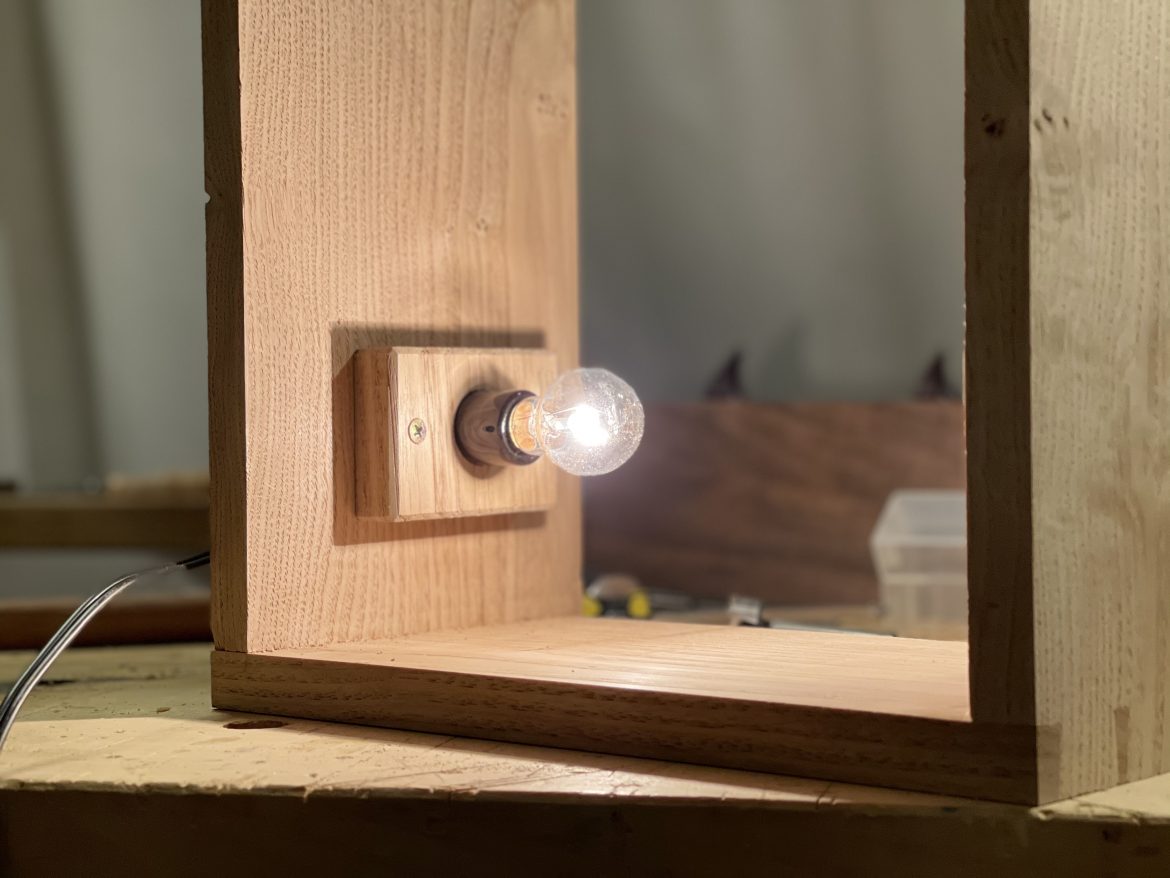
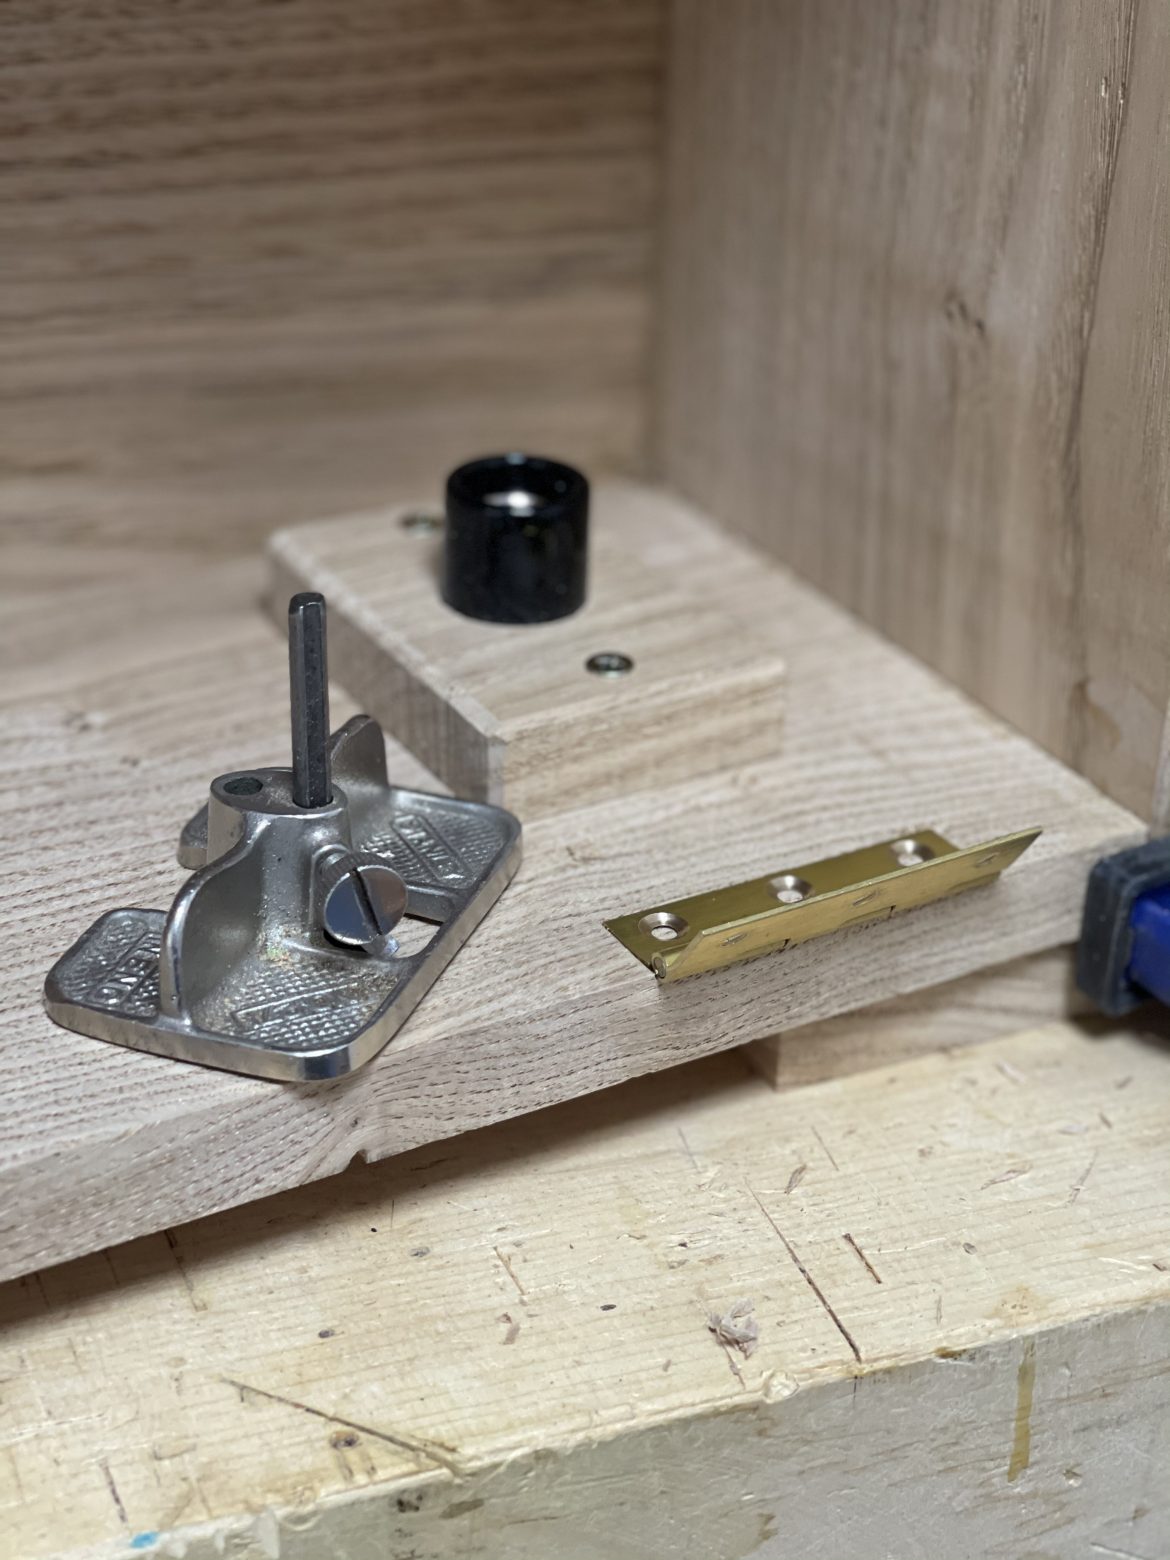
A Light Accident.
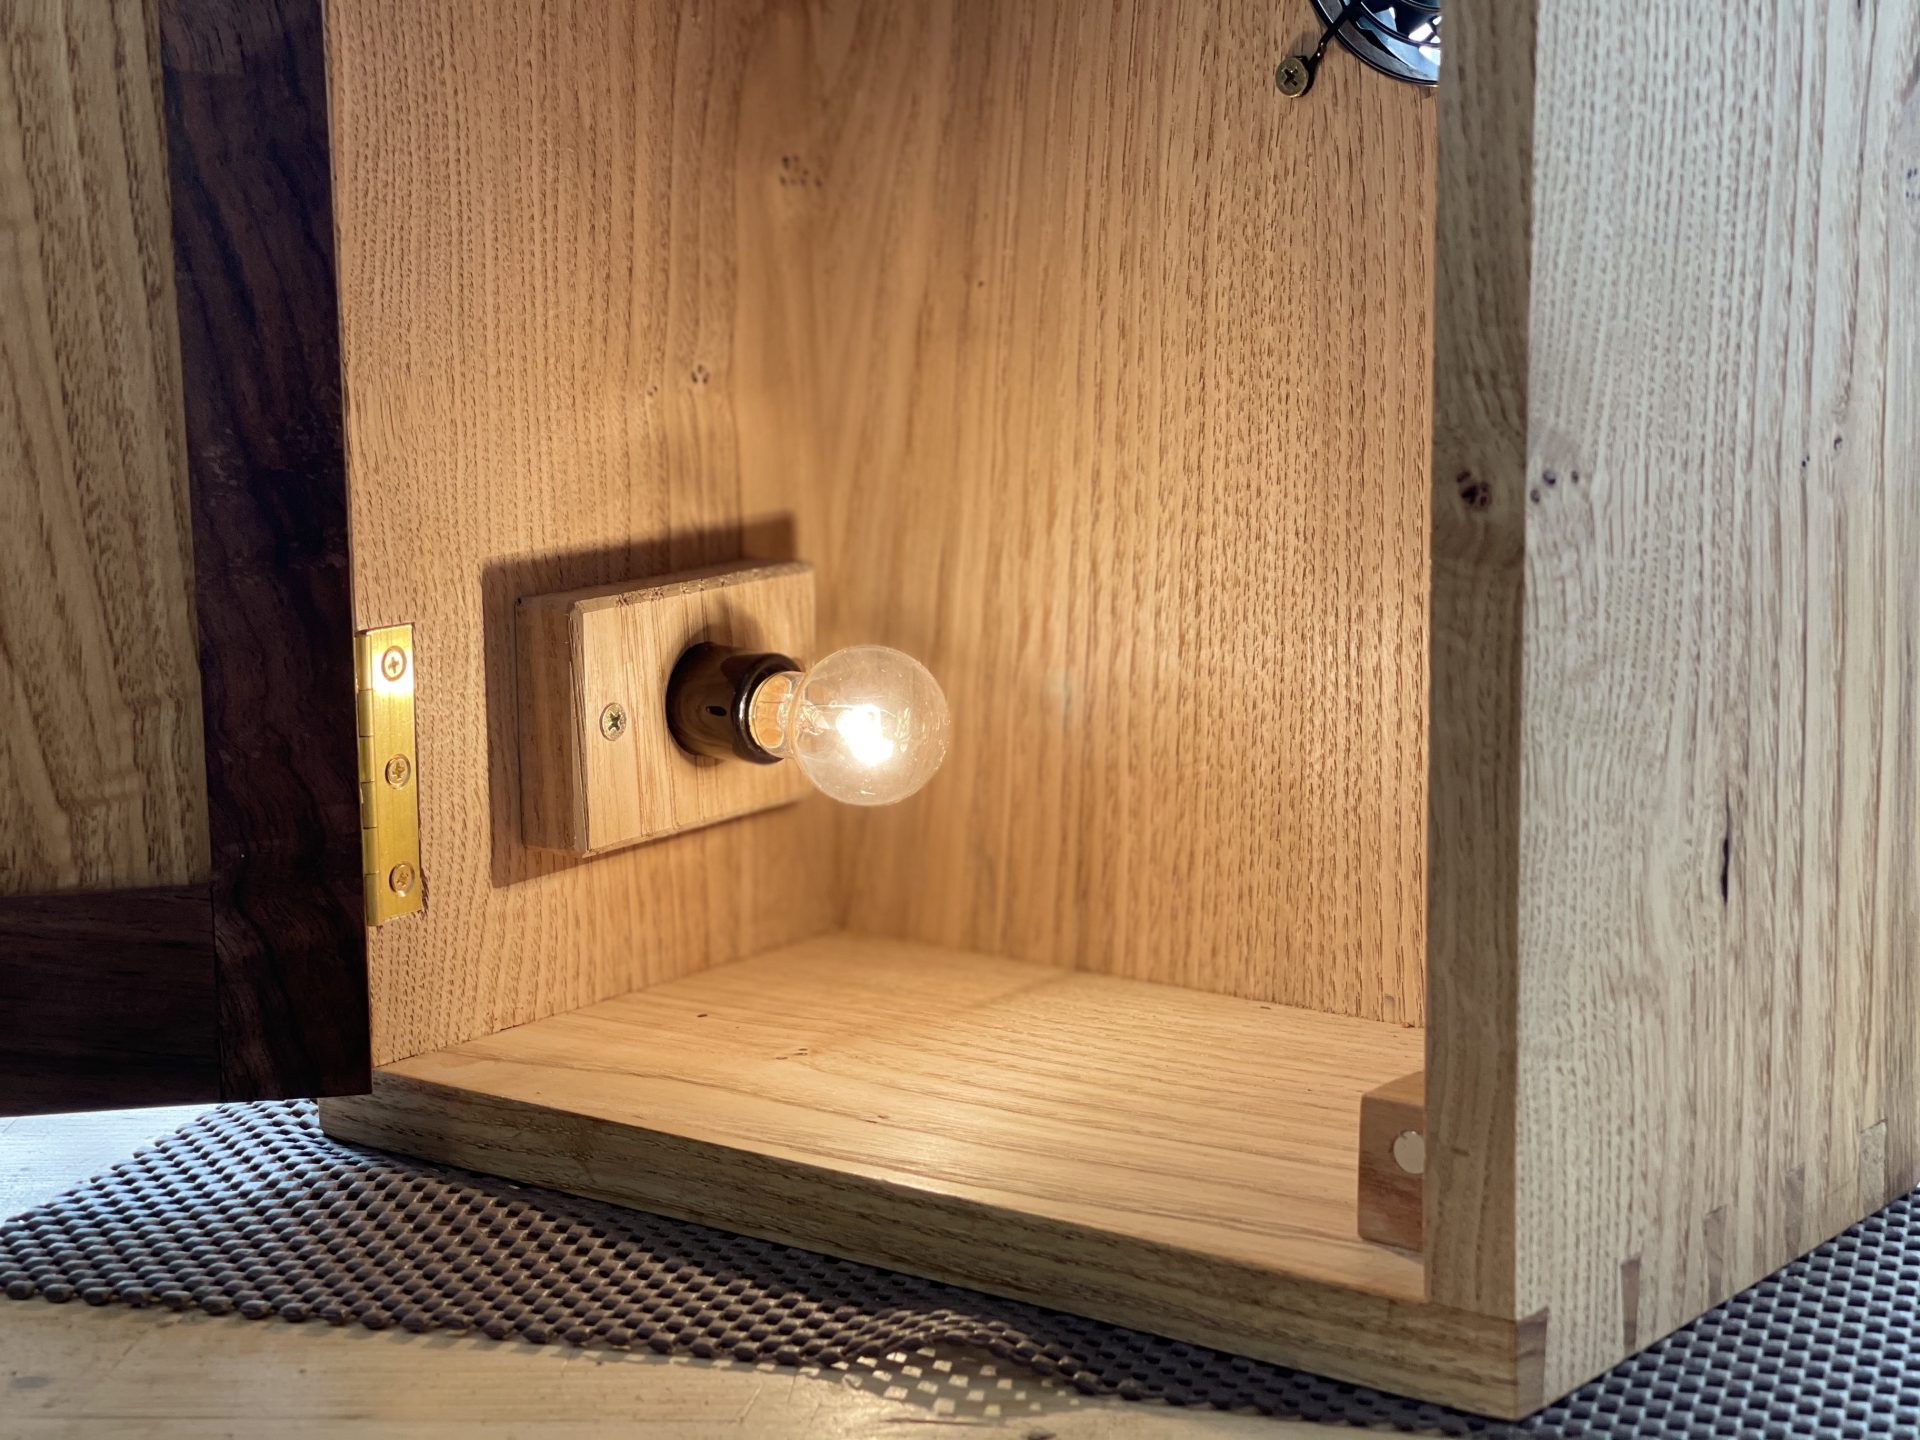
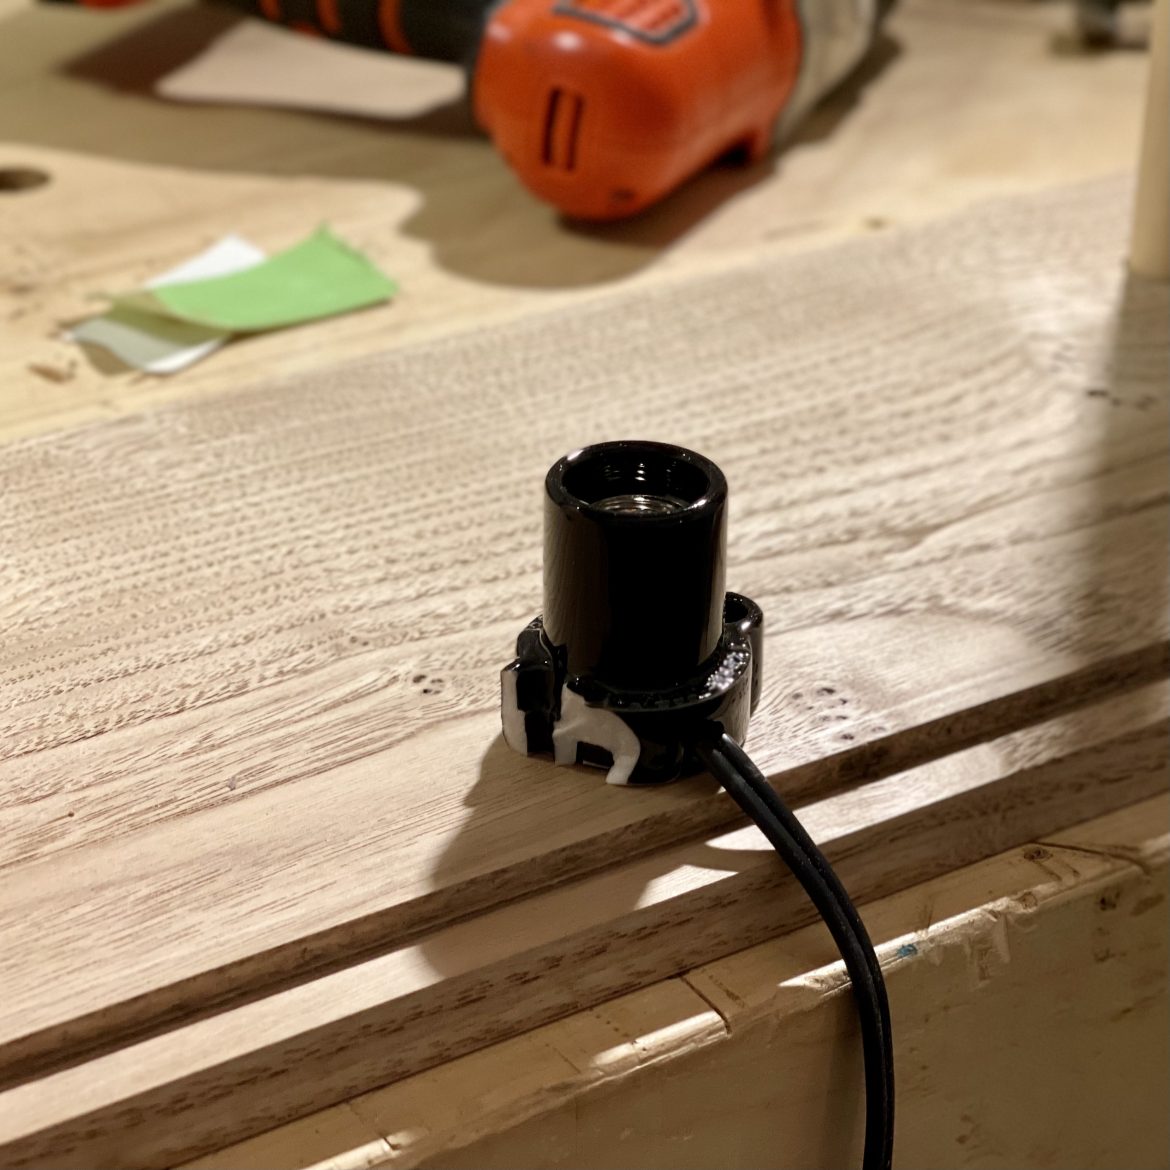
I locally sourced a small incandescent lightbulb socket which accepted two screws. The porcelain base caused my first woes of the project. As I attempted to seat the socket onto the side of the carcass, I (foolishly) tried to use countersink wood screws rather than pan-head wood screws. The taper of the countersink forced into the hole of the porcelain split it with a shower of tiny porcelain chunks spread across my bench.
I debate going back to purchase another socket but was running out of time. I decided to make a cover for the socket instead. I took piece of cut off from the carcass and put a hole the size of the socket in the Relative Center™. I then hollowed out the middle area enough for the socket to seat a little less than flush with the back of the piece. With a hole on the outside of the carcass, I fed the power cable through and screwed the decorate cover in place. I think it turned out way better than the socket was going to look. Win.
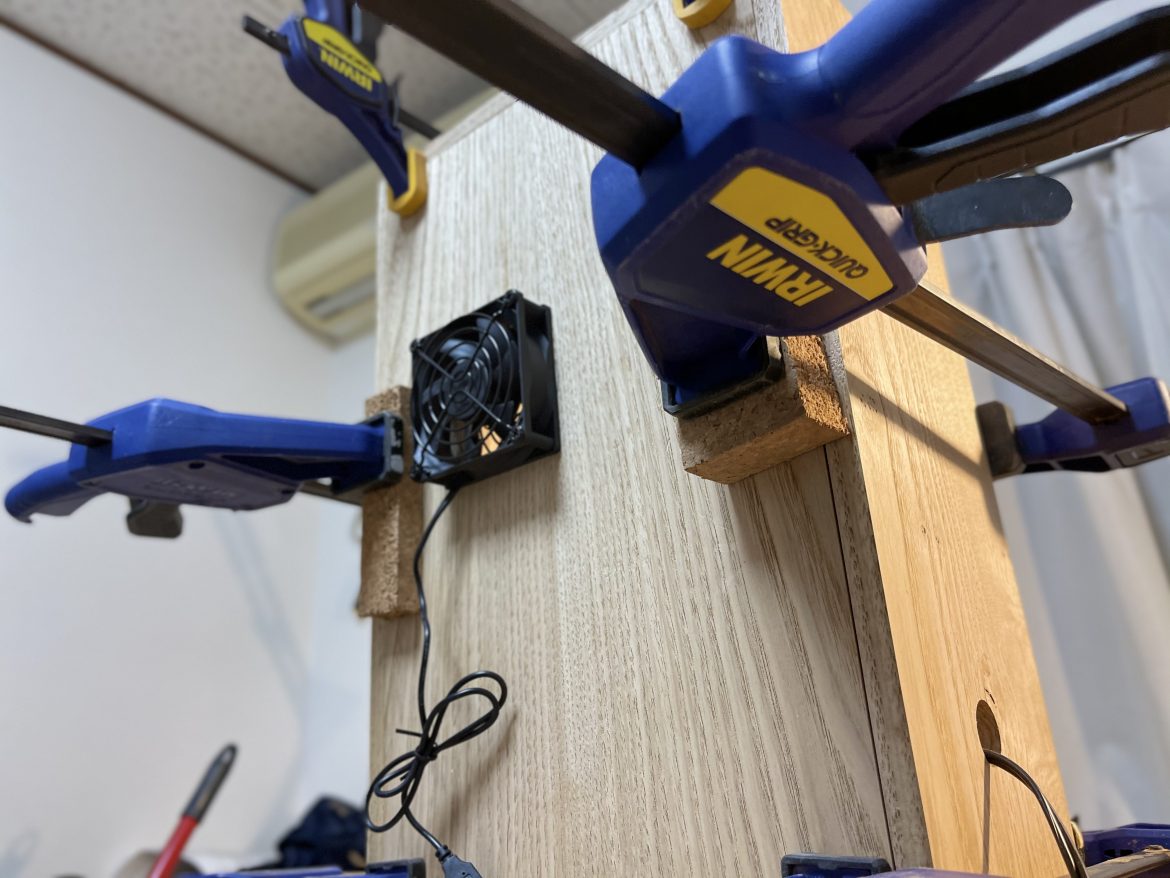
Panels and a Fan.
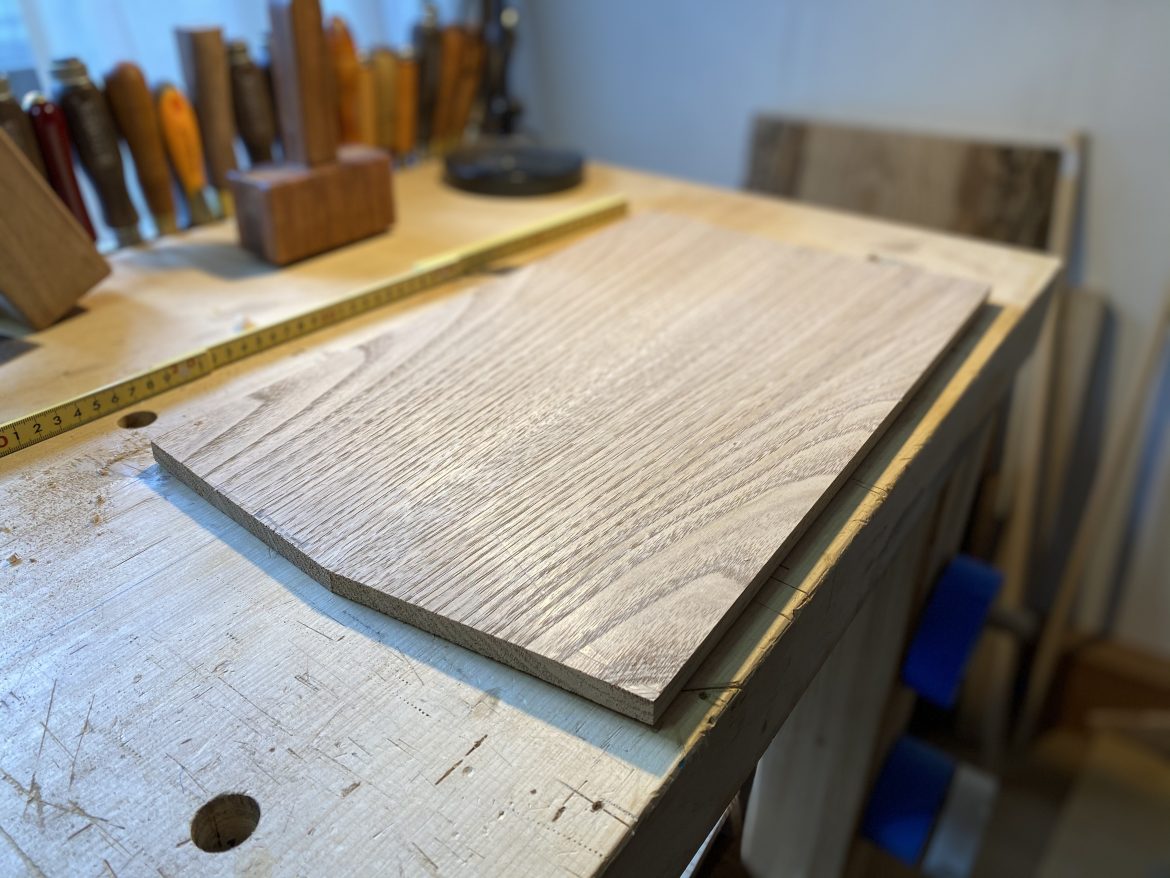
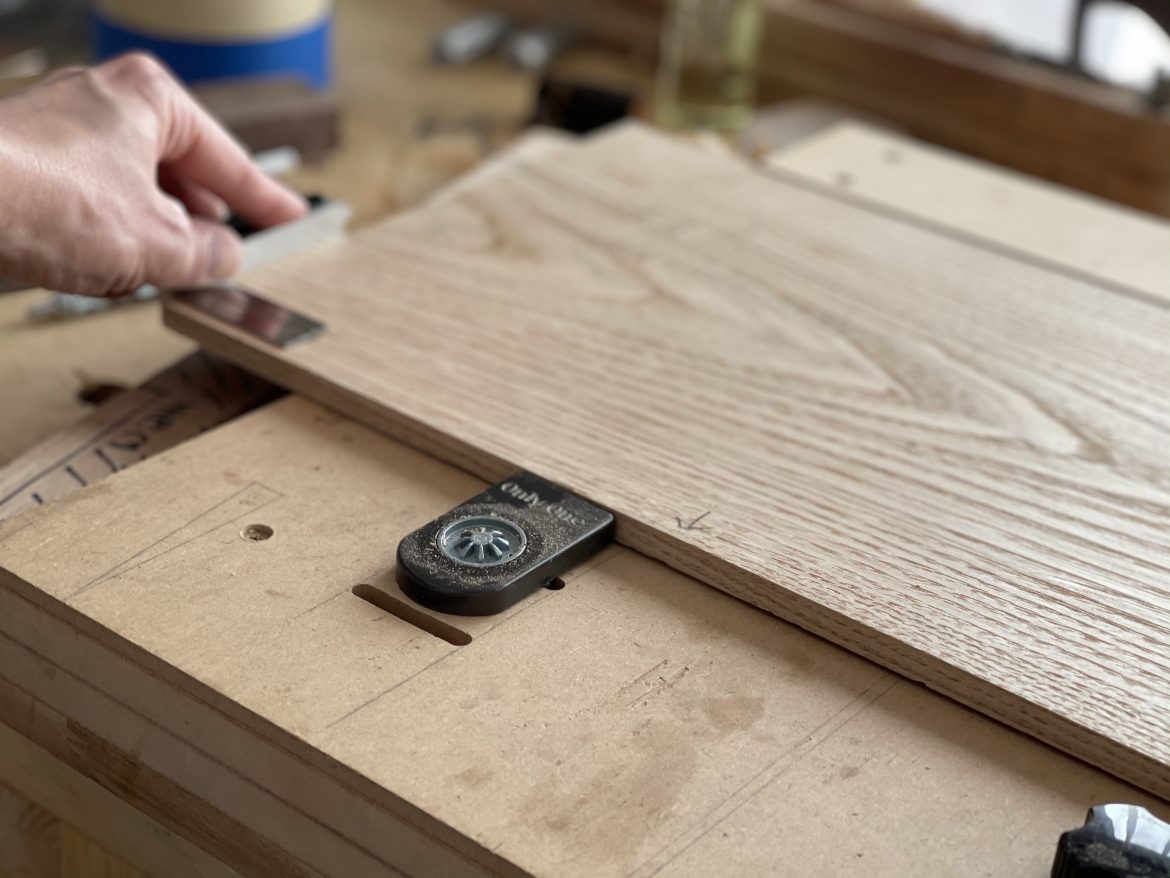
I made the door panel and the back carcass panel at the same time. I used more chestnut for these panels. After resawing them, I made two oversized book matched panels.
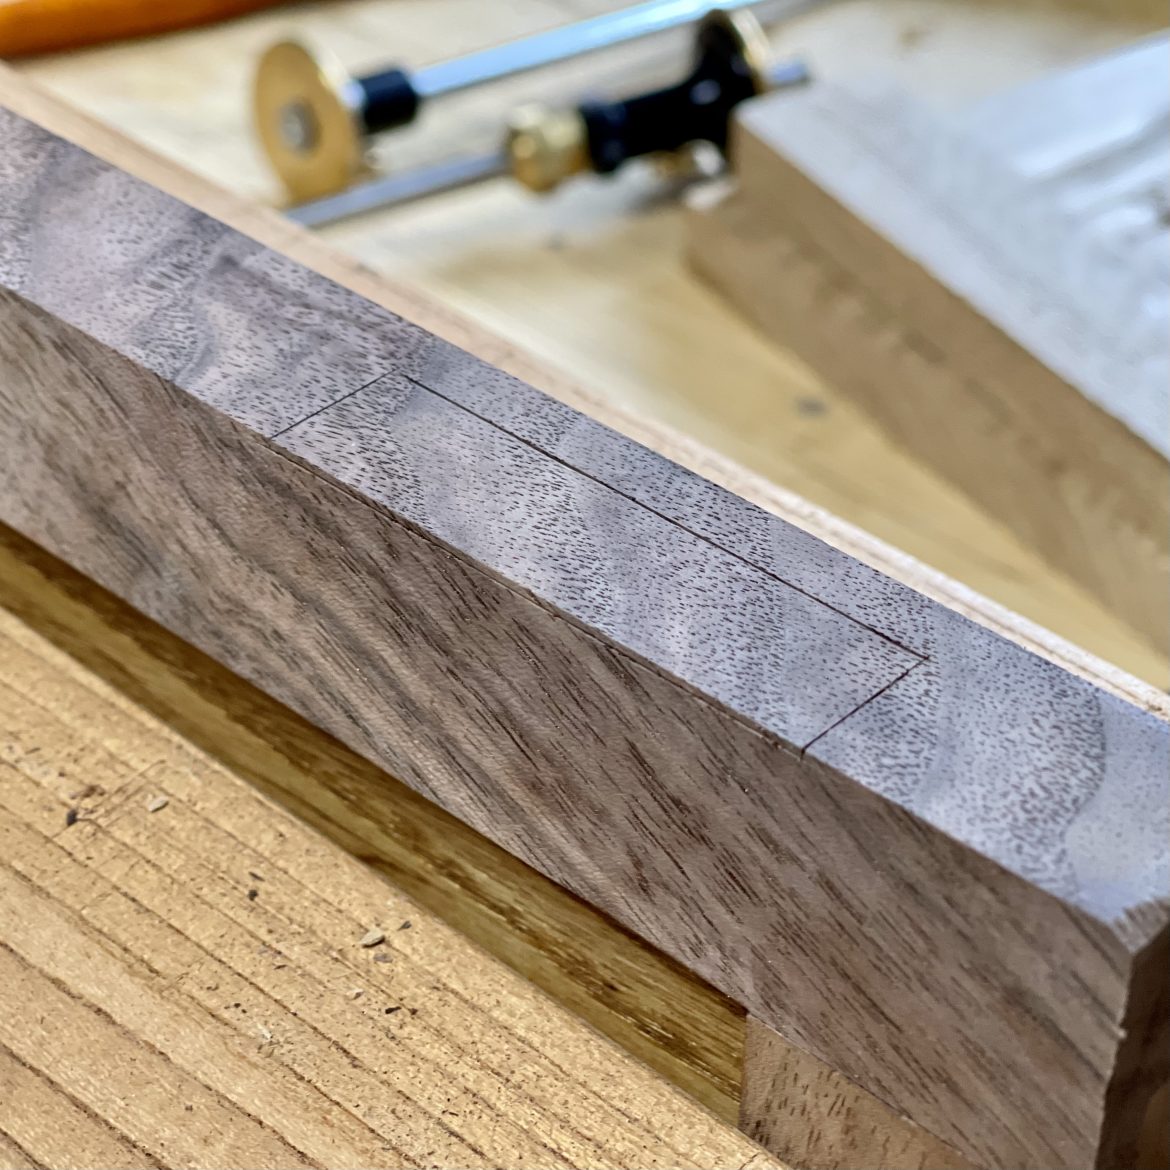
Before finalizing the size of the back panel, I put a 2” hole in the back to accept the fan. An important note given to me was to ensure the air flowed OUT of the carcass rather than into the carcass. This was to allow continuous moisture reduction inside once the door was shut. With the fan hole cut, I finalized the back panel and glued it in.
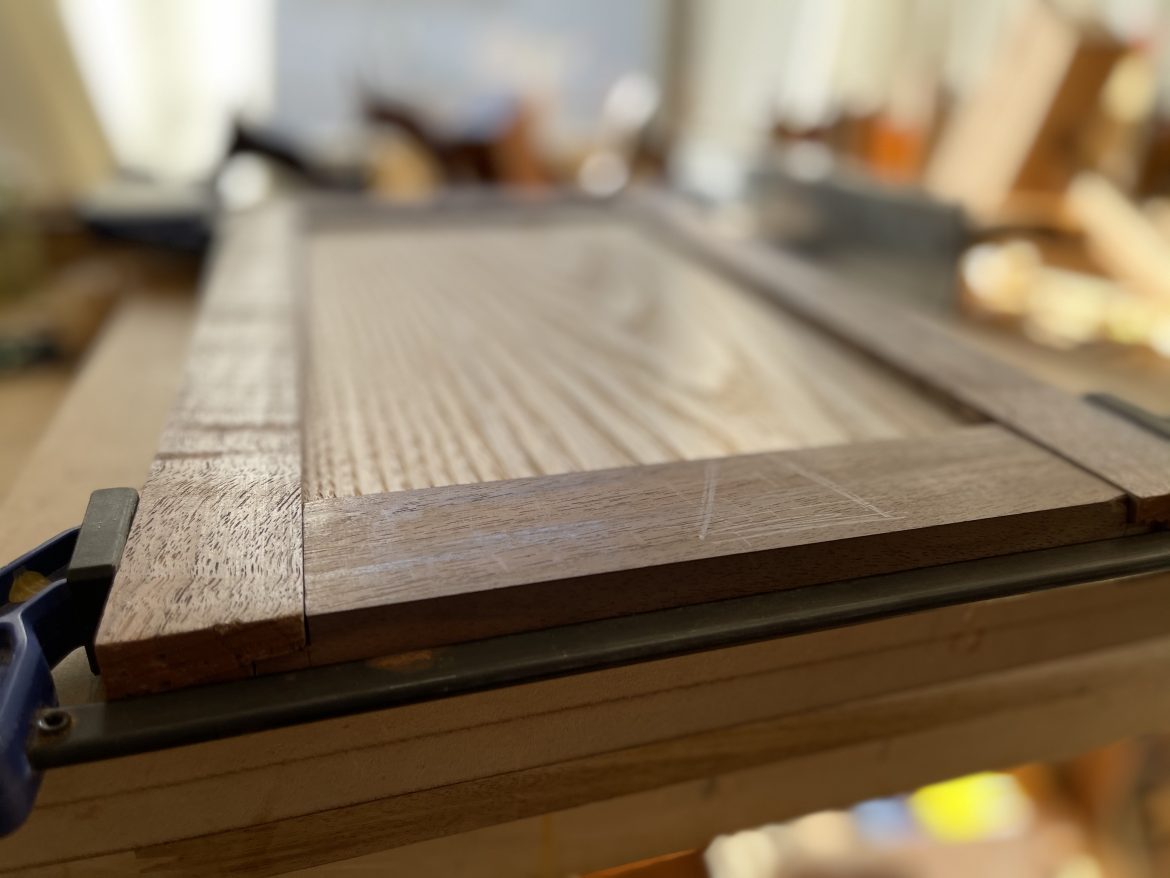
The Warped Door
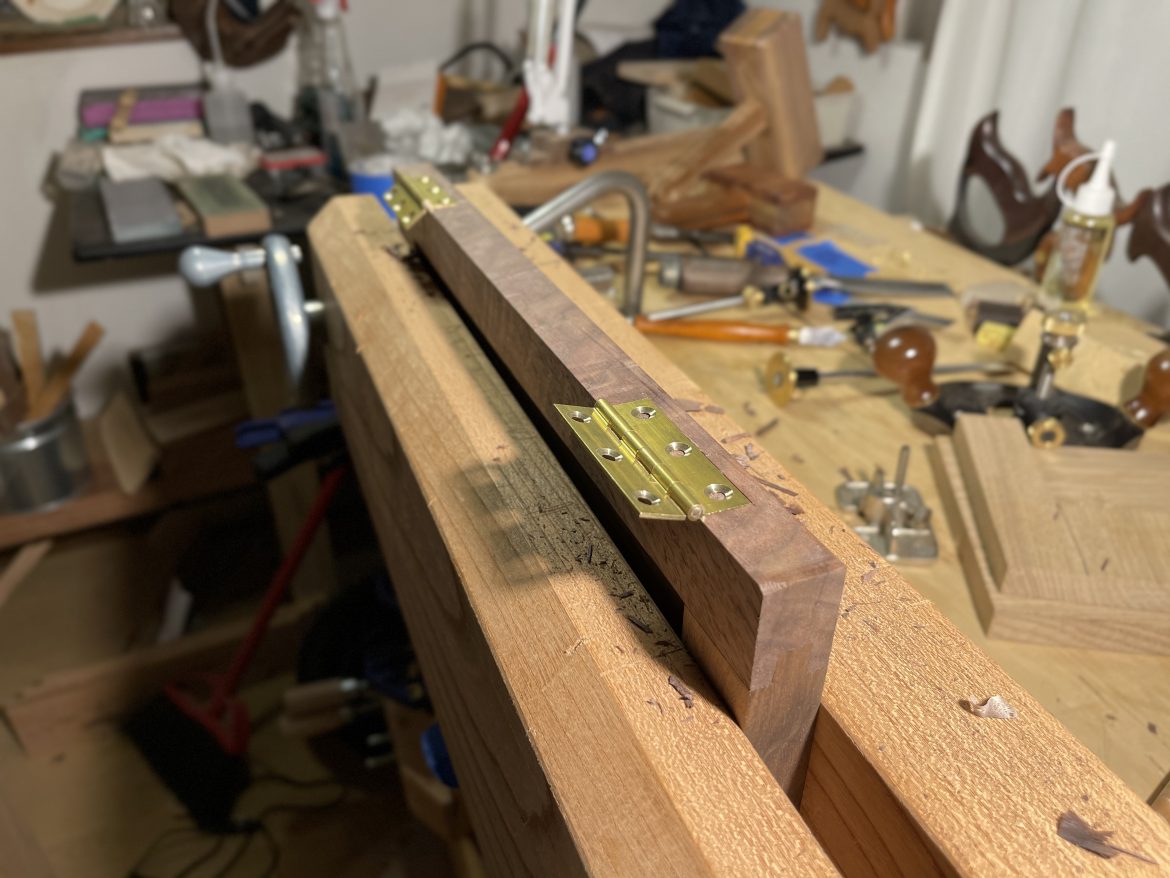
The final component to complete – the frame and panel door – caused me quite the headache. Creating the individual pieces for the door went well other than a slight hiccup with the plough plane. The black walnut was turning out to provide a beautiful contrast with the chestnut. I also found nice curly figure awaiting inside the board after ripping the components for the frame. Then I ran into issues.
I did several dry runs for the glue up. I modified clamps where they needed to be. I ran through the process several times. All the components were labeled appropriately. I was ready to go. I conducted the glue-up. Once the door came out of clamps though, I found the door had warped.
The upper right side twisted outward. This was to be the side from where the door opened. The bottom sat flush against the carcass while the hinge side was also sitting flush, but for some reason, it slowly tapered upward and out till there was about 3mm protruding outward. I had to fix it.
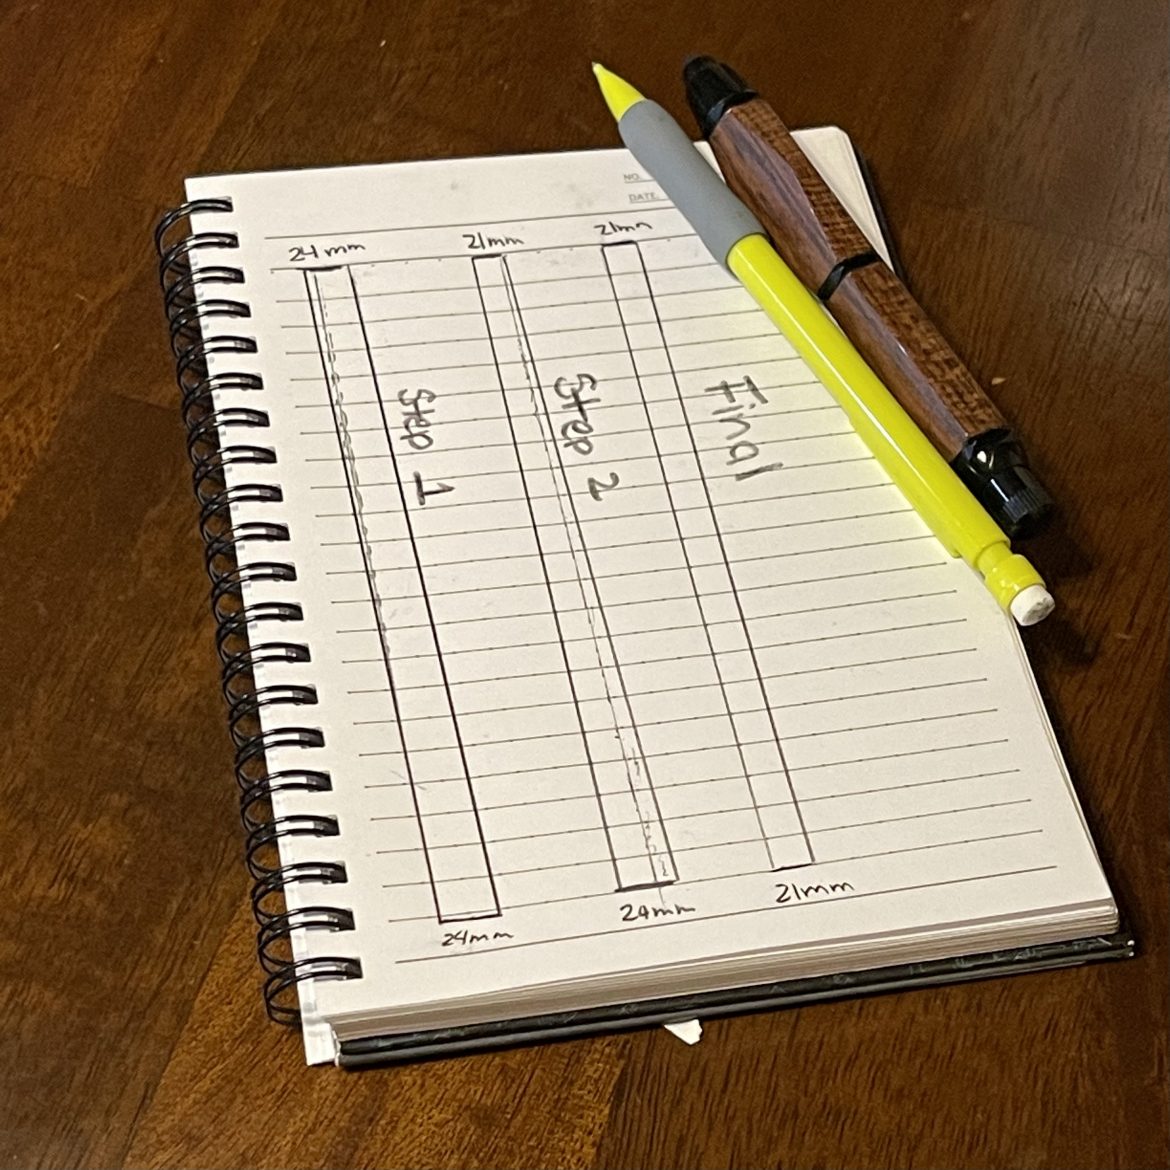
First, with the door hung and holding the bottom in place by hand, I pencil scribed a line from where the inconsistency started to the top. With a reference now, I methodically started planing at the top and then slowly started working back from where the jutting out started. I would hang the door again every now and then to check progress.
Using the line as guidance really helped. When I began to get close, I would hang, check, unscrew, plane, hang, rinse, repeat. Like I said yesterday in my post, having spare screws helped tremendously.
Once flush, the taper was noticeable. Even with a difference of 3mm, it looked unsightly. Using digital calipers to get the distance of the top end, I used that measurement setting to plane the bottom of the frame on the *inside face* of the frame. This mostly removed the taper. I then put a slight chamfer on the inside. To tell that something was amiss, you would now really have to be paying attention. And unless my friend reads this article, he’ll likely never know.
Mounting the hinges went quickly. I took it slow and used every hand tool I had at my disposal for the task. It wasn’t bad for a first-time doing butt hinges.
Done!
In about a month, I turned a chestnut slab and some black walnut offcuts into a biltong box. To date, it has been my fastest project. Maybe I work better with a deadline.
I was able to present it to my friend before he left Japan although I did have to mail it him as he was done packing up by the time I was able to show him.
Once it arrived, he took it on its first maiden meat drying voyage. He promised the results were satisfying and delicious. The results make me want to build one for myself. I’d probably skip the dovetails though.
Finished!

The final cabinet

Light works!

I also added a little magnetic catch at the bottom
")
Mmmmm. Dovetails....